Tag Archive | recipe

Love asparagus? Love a meal that’s ready in less than half an hour?

Then you’ve come (virtually) to the right place!

After a super-busy afternoon of shopping for plants (more on that in a future gardening post) and visiting the animals at our local farmers market/petting zoo, we arrived home hungry and with not very much food in the house, and with what I had in the fridge I was inspired to create this:

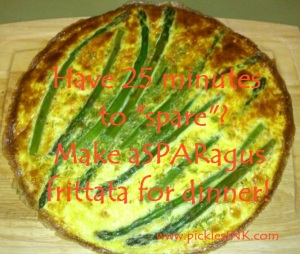
Asparagus fritatta

25-minute asparagus frittata

You will need:

  • a large oven-safe skillet or frying pan (I prefer non-stick)
  • a pot of boiling water to blanch asparagus
  • 1/2 pound fresh (preferably local!) asparagus
  • 1 cup diced cooked ham
  • 1-2 tbsp chopped fresh chives
  • 8 eggs
  • 3/4 cup milk
  • oil or cooking spray for pan
  • salt and pepper to taste

Instructions:

1. Boil water and blanch 1/2 pound of asparagus to your preferred tenderness, then cool quickly with cold water. (Full disclosure: I cooked the whole pound and ate half of it while cooking the frittata. It was delicious, but there were consequences.)

2. Mix eggs, ham, milk, chives, and salt and pepper in a bowl while preheating oiled pan. Turn broiler to high.

3. Pour egg mixture into preheated pan and arrange asparagus spears on top.* Cook for 2-3 minutes on top of stove, then transfer to oven. Cook on middle rack (10-12 inches from the broiler) for about 10 minutes, until middle is set and top is nicely browned.

4. Cut into wedges, serve, and enjoy!

Molly ate her frittata with relish. Figuratively. Not literally, because that would be really gross. Although she would probably love it; we are talking about a kid who dips dill pickles in vanilla yoghurt.

Molly enjoying

Molly enjoying her frittata with figurative relish.
©PicklesINK 2013

Ian was also a fan, although you can’t really tell from his expression. He is actually enjoying the frittata, just not the act of getting his picture taken. I’m pretty sure he took up photography just to make sure he could always be the one behind the camera.

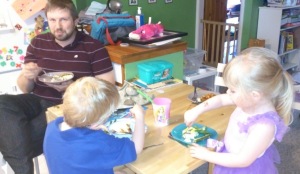
Everyone enjoying

Ian, Ben, and Molly at the dinner table.
©PicklesINK 2013

Ben, as is often the case, took some time to warm up to the idea:

“What’s for dinner?”

“Asparagus frittata!”

“I don’t like that!”

“Yes, you do.”

“No I don’t! What’s in it?”

“All things you like. Eggs, ham, asparagus.”

“I don’t like asparagus!”

“You like ham and eggs.”

“I want JUST eggs! Is it like scrambled eggs?”

“Yes.”

“BUT I don’t LIKE scrambled eggs [damnit, it was a trick question!]! I only like boiled eggs!”

“You like frittata. It’s eggs with ham and asparagus in it.”

“I don’t like them IN it! Can I have the asparagus BESIDE it?”

“Fine.”

“And the ham beside it?”

“NO!”

“OOOOHHHHHHHHH!!! BUT I don’t WANT it IN it!!”

“YOU’LL LIKE IT!”

“NO I WON’T! I WON’T LIKE IT AND I’M NOT GOING TO EAT IT!!”

*10 minutes later*

“Mmmm….this is really good. I like this dinner. Actually, mommy, I LOVE this diner!”

Me: *headdesk*

Ben enjoying

Ben LOVING his ham frittata with asparagus, as requested, beside it.
©PicklesINK 2013

~ karyn

*You could also chop the asparagus into bite-sized pieces before blanching and mix them with the rest of the ingredients. The full spears can get a little stringy when broiled and Molly found them hard to chew, so I will probably do that next time. It’s much prettier with the whole spears though!

Who decided to call it March “Break” anyway?

I’m ba-a-ack!! Sorry about the bloggy hiatus. It’s been a bit of a hectic couple of weeks around here! My car has been fixed, no thanks to Mazda (I won’t get into that though…feel free to scroll back through my Twitter for details). So far I haven’t received the bill, so I’m just pretending it doesn’t exist…not necessarily a sustainable plan over the long term, but it’s working for me right now!

It seems that Mother Nature has decided to tack the winter she forgot to give us last year onto the end of this one. Watching the blowing snow out my living room window day after day I’m starting to feel like I’m trapped in a Laura Ingalls Wilder book. But I digress.

We had a great March Break but I don’t think you can really call it a “break!” We went up to my parents’ ski chalet for the week, bringing friends and our babysitter Victoria with us. When we got there, Ben and Molly spent an hour bouncing off the walls – “When are Noah and Ella going to be here? Are they here yet? When are they going to get here? AREN’T THEY HERE YET???” I think that was when Victoria started wondering what she had gotten herself into…

Noah and Ella and their parents arrived and the kids settled right in together:

Hanging out 1

Ben and Noah and Molly and Ella giggling together in chairs (no plans for bedtime any time soon!)
©PicklesINK 2013

Ben and Noah went to ski day camp in the mornings and both improved immensely skiing-wise. Michael (Noah and Ella’s dad) and I got some great skiing in too. I think we managed to go through every snow condition possible – warm, sticky spring, fresh powder, icy pellets, freezing cold dead of winter. It was like the entire ski season compressed itself into 3 days!

Ben skiing 2

Ben skiing. I think this was the really cold day – note the icy patch on his left
©PicklesINK 2013

With a 2-hour group lesson every day, Ben and Noah both improved immensely. Ben continues to work his way through the fast-food metaphors, having now graduated from doing “pizza slices” and onto “french fries.” They also became quite well-known at the hill – “Are you Ben’s mom? Oh my gosh, he and Noah are SO. CUTE. They are so chatty! And they were holding hands while they were waiting for the lift.”

Noah skiing

Looking good, Noah!
Photo credit: Karen Topper

Ben skiing

Ben’s kind of halfway between the pizza slice and the french fries here.
Photo credit: Karen Topper

Much to their mommies’ terror, the reward for a good day of skiing seemed to be a trip down the free-style terrain park. There’s nothing quite like seeing your 5 year-old sliding across rails and off ski jumps to strike cold fear into your heart!

Molly also tried her hand…er…her feet at skiing. Boy, was my back sore after that…

???????????????????????????????

Mommy and Molly skiing together
©PicklesINK 2013

As I’m sure you gathered from her expression, she hated it! She wasn’t totally satisfied though – I asked how she liked it and she said, “Great! But faster next time, Mommy, okay? Faster!”

???????????????????????????????

Mommy helping grinning Molly back up at the bottom of the hill
©PicklesINK 2013

Ben finally got to experience his first sleepover. We’ve tried a few times letting him and Molly share a room, and sadly it always ends in disaster. The closest they came to making it work was a few weeks ago when Ben finally fell asleep and stayed that way, despite Molly sitting up beside him kicking him with both legs yelling, “Ben? BEN? Wake up, Ben! I want to play! BEEEEENNNNN!!!”

Ben and Noah, happily, were able to make it work, much to Ben’s delight – “A sleepover with my BEST FRIEND? THIS IS THE GREATEST NIGHT EVER!!” Towards the early hours of the morning we did discover that Ben, like his parents before him, is a cover-hog. My advice for marital harmony, folks? Two words: Separate duvets.

Sleepover

Ben and Noah’s sleepover
©PicklesINK 2013

Thanks to Victoria, we grown-ups were able to enjoy a lovely night out at a beautiful local restaurant called Mrs. Mitchell’s, named after the last and longest-serving teacher at the one-room schoolhouse that now houses the restaurant. If you’re in the area, don’t miss it! (If you can’t get there, at least try making their famous spoon bread at home). The waitress told us one of the best stories ever about my mom and aunt (identical twins): “You know how they look exactly alike but one of them is chattier than the other? For years I thought they were the same person but with multiple personalities. Then one day they came in together and I nearly fell off my chair!”

Mrs. Mitchell’s is also famous for their afternoon tea, which has been a favourite of mine (and hasn’t changed much!) since I was little. Karen and I brought Molly and Ella for a “Princess Tea Party” on our last afternoon.

Princess tea party 2

Molly’s first taste of tea
©PicklesINK 2013

Really, what could be better than an individual basket of fresh-baked scones and sweet potato and walnut muffins served with strawberry preserves, cream, and whipped butter? Not much, say I!

Princess tea party 1

Molly enjoying her muffin
©PicklesINK 2013

Ben and Noah made good use of their time while the girls were gone, converting the chalet into a bookstore, complete with window display and “employees only” area.

Bookstore 1

Ben and Noah’s bookshop window display (visible from outside as we drove up!)
©PicklesINK 2013

Bookstore 2

Sign reads “Noah and Ben’s book store – staff only”
©PicklesINK 2013

When we got back, they were down in the “staff only” area hard at work writing and illustrating their debut novel, “Journey To The End Of The Pine River.” [*Spoiler alert*] I assume that part of the story will deal with the existential futility of trying to play Poohsticks with pieces of ice…

Bridge 3

Noah, Ella, Ben and Molly playing Poohsticks with ice – sadly, a losing battle.
©PicklesINK 2013

All in all, an excellent but exhausting week! Like I said at the beginning, I don’t know if you can really call it a “break.” Perhaps the concept was pioneered by a childless school principal – “EUREKA! I’ve just had the Greatest! Idea! Ever!!”

Bridge 4

Definitely worth it, though! Look at those grins!
©PicklesINK 2013

Or maybe it’s actually a clever acronym: March B.R.E.A.K. (Begetting Really Exhausted parents And Kids).

Aftermath

The Aftermath: I think Ian and Molly could have slept for a week!
©PicklesINK 2013

A ham-tastic series of recipes

My family often eats ham on New Year’s Eve. This year we were up at the chalet and I was in charge of groceries so I (deliberately) went a little overboard and got an enormous bone-in, spiral cut, cooked ham.

For the dinner itself, I heated the ham in the oven and served it with two salads, a green salad with diced apple and celery and vinaigrette, and a chopped cherry tomato and avocado salad with balsamic vinegar and olive oil.

For dessert I made Dump Cake, which is a classic kid-chef-friendly recipe. I’ve seen the recipe a few places with a few variations (ie. adding nuts or chocolate chips), but the basic instructions are: Dump into a baking pan, in this order (without stirring, but try to spread the layers evenly), 1 can undrained crushed pineapple, 1 can fruit pie filling (I used strawberry rhubarb), and 1 box yellow cake mix; top with 2 sticks of butter each cut into 12 slices; and bake for 1 hour at 350°F. It comes out as more of a cobbler than a cake and is absolutely delicious, hot or cold.

When I came home, I had about 2/3 of the ham, including the bone, left, and I have made making the most (so to speak) of the leftovers, and let me tell you, they have been tasting souperheheheh.

I started by cutting the ham off the bone as closely as I could and dicing it. I used about half of that ham to make my first soup, ham, leek, and potato. Sadly, I was engrossed in the process and forgot to take pictures of that one. Please take my word for it – it looked a-FREAKING-mazing.

Ham, Leek and Potato Soup

Ingredients (all amounts are VERY approximate)

  • 3 cups diced cooked ham
  • 3 cups 1/2″ cubed Yukon gold potatoes, unpeeled
  • 3 stalks leeks, finely chopped and WELL rinsed
  • 1 can evaporated milk
  • combination of about 1/3 milk to 2/3 water to just cover ham and vegetables

Cook the leeks and ham in a little bit of oil in large pot until leeks are soft and slightly browned. Dump everything else into the pot. Bring to a boil and then lower to a gentle simmer. Leave it alone for an hour or so. Come back and add some cream and a cornstarch slurry if you like a thick soup. Serve with a really lovely artisanal bread, preferably potato scallion or whole garlic clove or the like.

While that soup was simmering, I used a little bit of the remaining diced ham to make dinner for the kids – “Dora’s Empanadas” from the Dora and Diego Let’s Cook cookbook that Molly got for Christmas from her cousins. Basically, you make a filling out of diced stuff (I used carrots, peas, ham, and grated cheese), cut circles of of refrigerated pre-made pie crust, fill, fold over pastry and seal edges, and bake for 12-14 minutes at 400°F. I put the rest of the diced ham in a large freezer bag and froze it.

Finally, I made ham stock: I put the ham-bone in a large pot, added about a handful each of roughly chopped carrot, onion, and celery and a handful of bay leaves and peppercorns, filled the pot with water, turned on the heat and left it all to simmer for hours and hours and hours. After what was probably actually 2-3 hours, I turned off the heat and left it to cool, then strained it and poured it into containers to freeze. It made about 8 cups of stock in all.

Phew! That was the end of my January 2nd.

The next soup I made was a brilliantly purple concoction that couldn’t be beet! (Okay, I’ll be honest – I did that for comic effect. It was in fact mostly beet.) I rooted around in my vegetable drawer for just the right veggies to roast for it. This thick, winter soup would be just the thing to keep you kale and hearty… All right, I’m done. For now. Here’s the recipe:

Roasted Vegetable Soup with Kale

Ingredients (again, all amounts are VERY approximate)

  • Various vegetables, emphasis on roots – I used beets, carrots, onions, parsnips, and one sad-looking wrinkly zucchini that I found in the back of the crisper – scrubbed, ends trimmed off, peeled if necessary (I peeled the onions, carrots, and parsnips but not the beets), and chopped into large pieces of 1 1/2 – 2 inches
  • mix of ham stock, water, and red wine to cover vegetables (I used about 2 cups ham stock, 1 cup red wine, about 1 cup apple cider and enough water to make up the difference)
  • 3/4 of a bunch of kale, stems included, chopped (I had used the rest in a fettucine carbonara as I couldn’t find basil – also not a bad call)
  • olive oil, salt and pepper, and bay leaves

Dump vegetables except for kale into a roasting pan, drizzle with olive oil and season with salt and fresh-ground pepper. Roast in 450°F oven until soft enough to pierce with a fork, about 45 minutes.
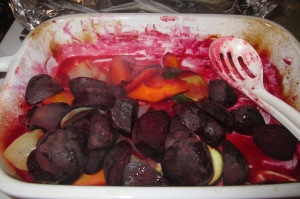
Roasted vegetables

Some of the vegetables post-roasting.
©PicklesINK 2012

Scoop vegetables into large pot. Deglaze roasting pan with a little bit of water to get every last bit of roasty goodness and dump that liquid into the pot too. Add enough ham stock, red wine, cider, and water to cover vegetables. (This could of course be made vegetarian and/or alcohol-free using vegetable stock and/or more cider or other juice.) My ham stock and red wine were both frozen, so I just dumped in the cubes and let them melt on the stove. NB – I freeze my leftover wine before it goes bad. I have seen it suggested that you freeze it in ice cube trays and then store in freezer bags. I tried that and it leaked EVERYWHERE – wine doesn’t freeze completely and the slushy-liquidness will find the tiniest hold in your bag. Now I freeze it in plastic containers.

Roasted veg in pot with ham stock

Roasted vegetables in soup pot with frozen ham stock.
©PicklesINK 2012

Stuff all the kale into the pot on top of the whole mess (Don’t panic – the kale will shrink significantly as it cooks!)

Roasted veg soup topped with kale

Masses of kale covering everything else.
©PicklesINK 2012

Toss in a few bay leaves, put a lid on it, and leave it to simmer for a couple of hours.

Roasted veg soup cooking

Violently purple soup cooking (see how the kale has shrunk to practically nothing)
©PicklesINK 2012

When it looks and smells lovely (assuming you like beets – otherwise, when it looks and smells revolting, but if you don’t like beets I have to question your judgment in making this particular soup as I was pretty up front about the ingredients), puree with a hand blender. It should be really thick and hearty and purple and ready to stain anything it touches. If you don’t have a hand blender, let it cool, then transfer to a blender and puree, then transfer back to the pot and reheat why don’t you? Go to the store right now and get a freaking hand blender because it’s the greatest small kitchen appliance you will ever own, especially if you like making soup.

Roasted veg soup pureed

Pureed roasted vegetable soup
©PicklesINK 2012

Ladle into a bowl, top with something a little sour like sauerkraut, sour cream, plain yoghurt, or blue cheese, and enjoy.
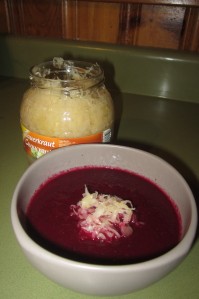
Roasted veg soup with sauerkraut

Roasted Vegetable soup topped with sauerkraut
©PicklesINK 2012

Try not to eat it all in one sitting, though, because there is a curious physiological effect to eating a lot of beets at once. You’ve been warned.

Finally, remembering how when I said, “I have leftover bone-in ham,” my little brother said, “And you’re making split-pea soup, right? WHY AREN’T YOU MAKING SPLIT-PEA SOUP RIGHT NOW?” the final stop on this ham-venture (hmm…weak. Ham-scusion? Ham-Odyssey? No, they’re getting worse. I guess I’d better let sleeping pigs lie) was of course split-pea soup. Especially after Ben saw the last one and said, “Molly, mommy made purple soup! Your favourite colour! Mommy, will you make green soup for me?” I made it on a night that Ian was away because he claims to not like it even though I tell him over and over that all I am saying is give peas a chance…

Anyway, this was the simplest of them all.

Split Pea and Ham Soup

Ingredients

  • split peas
  • ham
  • soup

Fine, I’ll give you more than that:

  • 3 cups dried quick-cooking split peas (I used a mix of green and yellow)
  • 2 cups diced ham (remember that bag of ham I froze?)
  • 8 cups ham stock
Split peas

Dried green and yellow split peas awaiting their
tragic yet delicious fate
©PicklesINK 2012

Rinse and drain split peas and add to ham stock in large pot.
Split peas and ham stock

Split peas and ham stock in my giant soup pot
©PicklesINK 2012

Bring to a boil, then reduce to a simmer. Leave it alone for an hour. Puree a little (leave it lumpy) with your hand blender while whispering lovingly to said blender, “How could I ever have lived without you, my precious?” and then add the ham.
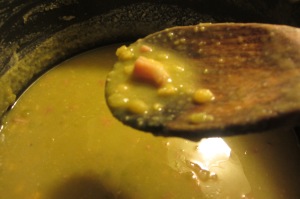
Split pea and ham soup

Mmmm…pot of simmering split-pea and ham soup
©PicklesINK 2012

Simmer a little longer to let all the flavours combine, then serve. It will thicken up quite a lot as it cools and be gorgeous and murky and pea-soupy and delicious.

Split pea soup in bowl

Bowl of hearty green split-pea and ham soup
©PicklesINK 2012

My notoriously picky eater, Ben (who has actually come A LONG WAY in the last few months) said, “Mommy, what are you making for dinner? It smells really yummy,” when he got home from school, and on tasting it, pronounced, “Mmm! This is really good! I LOVE this soup! Did you hear what I said? I don’t just like it, I love it!!” Molly said decidedly, “I DON’T like it,” and then proceeded to scrape her bowl clean before Ben was halfway through his.

I call that a win all around!

Sadly, I am now out of ham stock until I invest in another basketball-sized lump of pink goodness.

~ karyn

Have you made it through your holiday leftovers? What did you do with them?


Guest Post – Ice Cream Pizza

I have invited a guest blogger to write this post, since he is the one who introduced us to the idea of Ice Cream Pizza. I’ll let him introduce himself:

I am Benjamin Pickles and I’m 5 1/2 years old and Ben is the short form for my name.

I got the idea for ice cream pizza from Team Umizoomi.

This is a picture of Mili, Bot and Geo from Team Umizoomi.

On one episode they had to pump up an ice cream truck because the ice cream truck had a flat tire and they also had to make another ice cream pizza because there were 4 kids that were waiting for ice cream pizzas and there were only 3 ice cream pizzas. That’s how I found out how to make an ice cream pizza.

Recipe For Ice Cream Pizza

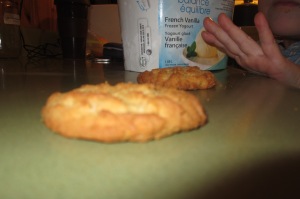
First step: A cookie

This is a picture of the cookie

This is a picture of the cookie. ©PicklesINK 2012

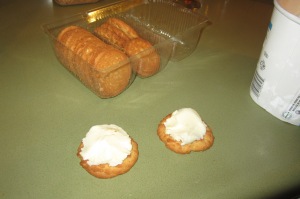
Second step: You need to put ice cream on the cookie.

This is two cookies with the ice cream on the cookies.

This is two cookies with the ice cream on the cookies. ©PicklesINK 2012

Third step: Put gummy candies on top of the ice cream on the cookie and you can put chocolate on it too.

This one is a picture of one ice cream pizza with the chocolate on it.

This one is a picture of one ice cream pizza with the chocolate on it. ©PicklesINK 2012

This one is a picture of the ice cream pizza with the gummy candies and the chocolate on it.

This one is a picture of the ice cream pizza with the gummy candies and the chocolate on it. ©PicklesINK 2012

And after that it’s all done! After you’ve made it, you can eat it!

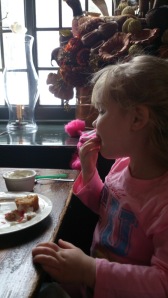
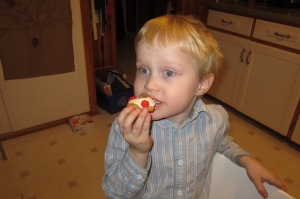
This is a picture of Molly eating an ice cream pizza.

This is a picture of Molly eating an ice cream pizza. ©PicklesINK 2012

This is a picture of me eating an ice cream pizza. ©PicklesINK 2012

This is a picture of me eating an ice cream pizza. ©PicklesINK 2012

If you try out the recipe you might like it or if you have kids they might like it too. Ice cream pizza is one of my favourite things to eat for dessert and I hope that you will like it too!

~ Ben

What do you think? Are you going to try it? Did you like it?

Salmon = WINNING!

Continuing with the winning salmon (or “pretty pink fish”) trend, yesterday I tried salmon and carrots en papillote.

Maple Dijon Salmon with Matchstick Carrots en Papillote

4 salmon portions (skin on or off)

1 – 1 1/2 cups julienned carrots

1 lemon, zested, juiced and cut into 1/8s

1 tbsp grainy Dijon mustard

2 tbsp maple syrup

parchment paper

Cut parchment paper into circles about 10″ in diameter (fold squares in half and cut out half-circles, then unfold). Stir together lemon zest, juice, mustard, and maple syrup and coat salmon with it.

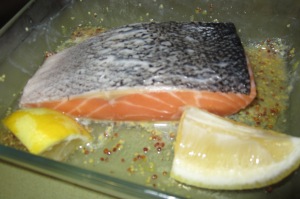
Salmon in maple Dijon dressing
©PicklesINK 2012

Place 1 portion of salmon on fold of parchment paper circle, pile 1/4 of carrots and 2 pieces of lemon on top. Form parchment paper “package” by joining sides of parchment together and then folding the sides over tightly several times; repeat around the whole edge of the parchment paper until it is tightly sealed.

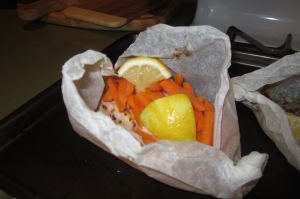
Cooked salmon in parchment
©PicklesINK 2012

Repeat to make the other 3 packets then place on a baking sheet and bake in 375°F oven for 12-15 minutes.

Ben’s dinner
©PicklesINK 2012

Ben. Ate. Every. Last. Bite.

I still don’t know what’s gotten into him, but I’m going to ride this wave while it’s here!

~ karyn

But I don’t LIKE that!

Food. Delicious, comforting, nutritious, not-so-nutritious, sweet, savoury, spicy, sticky, crunchy, chewy, bland food. Food can be a source of great pleasure…or, for the parents of a picky eater, agonizing despair.

Ben started life as a 4 lb. 10 oz. preemie, delivered at 33 1/2 weeks. Happily, aside from being teeny, he had none of the challenges one usually expects with babies born that early. He was fed first by nasogastric tube and then a combination of breast and bottle (the debate around which will I’m sure the topic of another post at some point).

Yes, he is doing “The Emperor” from Star Wars…
dun dun dun dun da dun dun da dun…
©PicklesINK 2012

We went on to start “solids” (purees) around 6 months and he ate ANYTHING. I was super-adventurous mom – I made my own baby food and mixed spices into everything (cinnamon carrots…curried chicken and broccoli…gingered squash). His favourite foods were kalmata olives, feta cheese, and anything with curry powder. I patted myself on the back and felt superior to all those moms who feed their kids boring purees and set themselves up for a lifetime of catering to their kids’ bland palates.

This was probably curried something.
©PicklesINK 2012

And then around 18 months, “More! More!” suddenly turned into “MMMMM!!” which is the sound of a toddler with his mouth clamped tighter than the trash compactor on the detention level of the Death Star. As an added bonus, always a bit of a puker (gastroesophageal reflux being one of his remaining preemie traits), Ben discovered the ability to barf on command to demonstrate his disinterest in eating something. Suddenly I had become a mom of a dreaded picky eater.

After I worked through the initial denial, anger, and grief (there is nothing quite like sobbing hysterically at the dinner table while Googling “How do I get my picky toddler to eat?” on your laptop while your 3 year-old screams, “NO!! I don’t LIKE that!! Why are you making me eat that?? I don’t LIKE it!!”), I slowly reached the acceptance stage.

A lot of the websites out there on picky eaters will tell you not to engage in power struggles – you choose what to put in front of your child and he or she chooses how much of it to eat and I wholeheartedly agree that power struggles around food can lead down an unhealthy path. The websites suggest offering a variety of foods, changing utensils, ignoring, removing distractions, using reward charts, etc. None of those tips worked for us and the list of things Ben wouldn’t eat grew: Raw vegetables were too crunchy. Cooked vegetables were too wet. Grapes and blueberries had skins. Ice cream was too cold. (ICE CREAM!! THE KID WOULDN’T EAT ICE CREAM, FOR GOODNESS’ SAKE!) Just about everything else “didn’t swallow very well” (ie. led to puking). And the behaviour at the dinner table (both his and ours) got worse and worse.

Finally we realized that we were dealing with two separate issues at mealtimes: what Ben ate and how he behaved. We decided that while we had no power over what he liked or how much he ate, we did have a responsibility to teach him to act appropriately at the table, and for us that meant no yelling, no arguing, and no declaring that he didn’t like something without trying it first. To deal with the behaviour piece we implemented the “try a bite or you sit out rule.” For time-outs we used Supernanny’s Naughty Step technique: the CALM but firm warning – place in neutral time-out spot for prescribed time period – return to time-out spot – repeat as necessary – apology – hug and kiss predictability of this worked really well for Ben and for us.

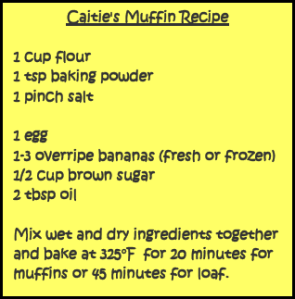
To deal with the “what Ben ate” piece, I focused on offering him a variety of foods but making what I knew he would eat as nutritious as possible, which meant making my own fish sticks and chicken fingers breaded in crushed bran or corn flakes, pureeing vegetables like carrots, zucchini, pumpkin or spinach into tomato sauce and serving over whole-wheat pasta, and baking a whole lot of the best ever “blank slate” muffins using my sister-in-law-to-be’s recipe:

These can be customized pretty any way you can think of – replace the banana and/or the oil with applesauce or jarred baby food (sweet potato or carrot work well); add grated or whole fruits or vegetables like carrot, zucchini, or berries; spice it up with vanilla, nutmeg, cinnamon, or cardamom; use whole wheat flour or oat bran for the flour; or boost the nutritional punch with additions like yoghurt, powdered milk, wheat germ, or ground flax – just increase the baking powder to help it rise as you add more “stuff.”

Ben turned 5 in May, and as suddenly as the pickiness started, it stopped – just in time, too, because Molly, who is NOT AT ALL a picky eater had just started to imitate her big brother’s, “I don’t LIKE that!!” just like she imitates everything else he does. Ben will now try most things that I put in front of him with, if not enthusiasm, at least much less argument than previously, and has even been heard in the past few months to say, “Can I try some of that, mommy?” The majority of these taste-tests now elicit a grudging, “Well, don’t LOVE it, but I LIKE it,” and in the words of Abraham “Grampa” Simpson, “Hot diggety-damn, that’s good enough for me!”

Ben enjoying a surf-and-turf dinner of lobster and steak with fuzzy water in a wine glass – “I don’t love the lobster, but I like it.”
©PicklesINK 2012

Molly, on the other hand, loves it.
©PicklesINK 2012

Ice cream: No longer “too cold.”
©PicklesINK 2012

And for Molly, ice cream = food = LOVE
©PicklesINK 2012