Tag Archive | craft

Everyday Elsa: One-hour DIY Elsa costume tutorial

Okay, brace yourself because I know this will come as a shock, but this summer Molly was obsessed with Elsa (I know, right? You never would have guessed!). I decided to earn some preschooler brownie points and get in some sewing practice at the same time, so I designed up an all-season Elsa costume.

At the time I was doing this, Frozen costumes were only available by lottery through Disney stores and on Ebay if you had a spare $600 lying around. As Halloween quickly approaches, they are much more widely available and super-pretty, but nothing beats the feeling of IF I CAN DO THAT I CAN DO FREAKING ANYTHING NOW WATCH ME BUILD A HOMESTEAD AND LIVE OFF THE LAND SKINNING ANTELOPE WITH MY TEETH FOR DINNER that accompanies making your kids’ costumes from scratch. Besides, it’s cheaper and your kids will totally think you’re a superhero. Continue reading

Emergency T-shirt refashion!!!

You know those times when you’re just minding your own business, trying to convince yourself to stop procrastinating and start working, when suddenly your best friend calls you up and is all, “So I just scored free tickets to the grand opening party for the new rock and roll exhibit at the Science Centre with Q107 tonight. Wanna go?” And you’re all, “Well, I really have to work and look after my kids and be a good wife and mom but uh HELLZ YES.”

So. Annoying.

Then I said, “What the hell am I going to wear?”

And she said, “Something rock and roll. Like a concert tee.”

But I was like, “The only concert tee I have is my Bowie shirt and it doesn’t fit.”

So she was all, “Too bad, SUCKAH!!!”

And I was totally, “OH YEAH? YOU WANNA GO? RIGHT NOW, BEE-YOTCH?? THAT’S RIGHT!!”

Then she was all —

All right, fine…that’s not *exactly* how it went, but it pretty much captures the essence of the conversation.

So there I was, faced with a fashion emergency, and there was only one possible answer: “Hie, my good steed – we must away to the land of PINTEREST,” and off I went to my handy T-shirt refashion board for inspiration. One pin was not quite what I was looking for but pointed me in the right direction (see what I did there with “pointed”?), and it was off to the races, or at least the sewing machine…

…and now I’m back to share my simple t-shirt + jeans refashion with you, dear readers!

Rock ‘n’ Roll Concert Tee + Jeans 30 Minute Refashion

(or more like 15 if you’re more experienced than me!)

Too small t-shirt + old ripped jeans = simple 30 minute refashion #DIY www.picklesINK.com

T-shirt + Jeans = 30 minute refashion

Step 1: Find that one too-small t-shirt that you have kept in your pajama drawer for 10  years even though it has never actually fit because they only had small when you bought and you haven’t been an adult size small since you grew boobs in grade 6 it so it’s wishful thinking to imagine that it will ever be wearable even as PJs because there is basically nothing in the world less comfortable than a too-tight, too-thick long-sleeved t-shirt but you never threw it out because BOWIE, amiright??

Too small t-shirt + old ripped jeans = simple 30 minute refashion #DIY www.picklesINK.com

David Bowie concert tee – would ANYONE throw that out??

Step 2: Find the ripped jeans that your big brother was kind enough to donate to your collection of random fabric and other assorted sewing crap.

Too small t-shirt + old ripped jeans = simple 30 minute refashion #DIY www.picklesINK.com

Every pair of my brother’s jeans for the last 30 years has wound up looking like this.

Step 3: Either using a shirt that you like the neckline of as a guide, or just winging it, depending on your comfort level, cut a more flattering neckline than the cross-between-crewneck-and-noose that the shirt came with. Again, using a shirt that you like as a guide if you wish, cut your choice of sleeve (or leave as is). I cut down the long sleeves to a short flutter sleeve. Finally, laying the shirt flat and making sure the sides are even, cut the sides of the shirt open up to just below the armpit seam.

Too small t-shirt + old ripped jeans = simple 30 minute refashion #DIY www.picklesINK.com

I winged it. I like to live dangerously.

Step 4: Okay, there’s 2 ways to do this next part:

EITHER

Measure around your hips (adding as many extra inches as you would like if you want the top to be flowy). Divide that number in half. Measure the width of the shirt, subtracting 1/2 inch for seam allowances (2 x 1/4 inch) Subtract the width of the shirt from the first number. Divide *that* number in half. Flatten the legs of the jeans with the inseam on the edge (I used the inseam because it was more visually interesting). Measure your latest number along the cuff of the jeans from the inseam edge towards the middle, add 1/4 inch seam allowance, and mark it. Measure the length of your cut from the bottom of the shirt to the armpit and add 1/4 seam allowance. Measure along the inseam of the jeans from the cuff up, adding 1/4 inch, and mark. (Are you confused yet?) Using a ruler, draw a line between your two markings and cut along the line. You will now have a right-angle triangle of folded fabric that will form a triangular insert on one side of your shirt. Cut the other jeans leg to match.*

OR

Lay a shirt that you like the fit of (I used a flowy one) on top of your t-shirt. Lay the folded jeans leg, cuff lined up with the bottom of the good-fit shirt and outside seam edge along the edge of the good fit t-shirt, and draw a line on the jeans from the bottom corner to the armpit of the t-shirt you are refashioning. Cut about 1/4 inch outside of that line for seam. Repeat with the other jeans leg. (My sister the quilter is currently going “EEP! EEP! EEP!” at my reckless disregard for exactness.)

Too small t-shirt + old ripped jeans = simple 30 minute refashion #DIY www.picklesINK.com

I think we all know which method I chose.

Step 5: Pin the insert  into the shirt, good sides together.

Too small t-shirt + old ripped jeans = simple 30 minute refashion #DIY www.picklesINK.com

Jeans, meet shirt. Shirt, jeans. You might as well get comfy with each other.

Step 6: Sew the insert in, starting from the bottom. The t-shirt will probably get a little gathered up in the armpit and that’s okay. I did both sides up to an inch or so below the armpit – it gets a little tight in there with the sharp turn, so I finished the rest of the sides before I tackled that, and I went over it a few times for strength.

Too small t-shirt + old ripped jeans = simple 30 minute refashion #DIY www.picklesINK.com

Sew, sew, sew your shirt, gently down the seam…

Voila! Attempt to take a flattering selfie that shows the whole shirt, fail miserably, and ask your neighbour to do it for you.

Too small t-shirt + old ripped jeans = simple 30 minute refashion #DIY www.picklesINK.com

On the left, my super-flattering, Instagram-worthy selfie that sadly doesn’t show the whole shirt. On the right, less flattering but more complete. Can’t win ’em all, right?


Good luck! Let me know how it goes!

~ karyn

*This is not the method I used, so I apologize if it makes no sense at all. I’m making it up. If you are using this method, you are probably better at this than I am and can probably figure out what I meant. Either way, good luck to you. If you do get hopelessly screwed up because of my screwing instruction, please feel free to comment, “You’re a complete jerk, Karyn,” and I will reply with a heartfelt apology.

Eating My Words Instead of My Treats – Halloween Safety Part 2

You may have noticed that I titled my previous post “Part 1.” Part 2 was supposed to be a snarky look at the rest of the usual Halloween safety tips flipped around like that  “How to Prevent Sexual Assault” meme (“If you see an unconscious woman, don’t rape her”) to put the onus on the grown-ups: So “Put reflective tape on your costume so cars don’t hit you” becomes “If you see kids in costumes on Halloween night, don’t hit them with your car, or better yet, don’t drive your car on Halloween night if you don’t have to.”

I know, I know – it needed work, but in my head it had potential.

Eating my words

Scary Jack-O-Lanterns. Text reads: Eating my Words Instead of Treats

Then my best friend’s mom went and died unexpectedly on Sunday night and suddenly not only did I lose all ability to think in terms of funny but all of my previously hilarious lines about there being no good reason to drive around on the one night of the year when you know there are going to be lots of children crossing the road suddenly became really assholey. An afternoon funeral, as it turns out, is a quite compelling reason for a large number of cars to be on the road at just such a time.

So instead of that post, I want to recognize my friend Jenn, who has faced an unspeakably horrible situation with an unimaginable amount of grace and courage. If you happen to have a few extra dollars burning a hole in your pocket, consider making a donation to Lupus Ontario in honour of her mom.

And now for some gratuitously adorable Halloween pictures:

Ben's pumpkin lookalike

Ben holding his pumpkin Doppleganger

The instructions from Farmer Charles on Molly’s school field trip were to select a pumpkin that looked like your head, so Ben brought him that one for inspection.

Ben and Molly and I “carved” pumpkins with the help of Ian’s power drill*, several chisels, and our 8 year-old neighbour Rebecca – air quotes because mostly Ben rode his bike and Molly supervised Rebecca’s pumpkin-gut-scooping. Rebecca very kindly helped Molly draw her pumpkin faces and Ben did his own.

Pumpkin collage

Clockwise from top left: Minion pumpkin, scaaaaarry pumpkins (ooooOOooooOOOooo), and Ben holding the “pumpkin doorstop”

Ben: “MOMMY!! I WANTED TO USE THE KNIFE!! Our Halloween safety rules from school said, ‘make sure a grown-up is WITH you when you carve it,’ NOT, ‘the grown-up should do it FOR YOU!!”

***

Rebecca: “I’m trying to make it look like a kid drew it.”

Me: *raises eyebrows*

Rebecca: “I mean, a LITTLER kid.”

***

Ben: “How do you make a SCARY pumpkin face?”

Molly: “You say, ‘OooooOOooOOOOOooo,’ while you draw it.”

***

Me: “OW!”

My brother James: “Careful. That’s probably sharp. It is a chisel, you know.”

Me: [redacted]

***

Ian: “Oops.”

Me: [also redacted]

Repaired pumpkin

Close-up of the minion head, the reason for the “oops.”

And finally, my split-personality minion Ben (heralded by the grade eights at his school as “OMG THE BEST COSTUME EVER”*) and Molly, who was,  “Uh…Pinkalicious. No, a fairy. No, a fairy princess. No, a pink princess fairy. No, Pinkalicious dressed as a fairy princess with a pink tiara. No, not Pinkalicious OR a fairy OR a princess OR a pink fairy princess – AGNES from Despicable Me. No, NOT Agnes. A pink fairy princess with fairy wings but NOT Pinkalicious dressed as a fairy. No, a fairy princess. But not with fairy wings. Just a princess. Rapunzel.”

Minion and Rapunzel

Minion(s) Ben and Rapunzel Molly

~ karyn

*Next year, jigsaw.

**For the DIYers out there – the minion costume is a collapsible laundry hamper from IKEA, purple and yellow felt, mason jar screw-top lids, purple tulle, denim overalls, black pleather pants** cut and pasted to be overalls, 2 pairs of kids shoes, gloves, and various other bits and bobs. I cut the lid out of the hamper and cut arm holes. Everything is secured with staples, safety pins, and/or hot glue (no sewing required). Ben is dressed as a minion underneath as well with overalls, yellow sweatshirt, and a crocheted minion hat courtesy of the fabulous Ingrid at Loveable Stitches (full disclosure: I’m also at Loveable Stitches. Check us out!)

***Size TWO pleather pants that I found second-hand at Once Upon a Child. WHO MAKES PLEATHER PANTS FOR TWO-YEAR-OLDS?? AND WHO BUYS PLEATHER PANTS FOR THEIR TWO-YEAR-OLD???****

****Okay, fine. Yes, *I* would probably buy pleather pants for my two-year-old. Are you happy now?

Some memories are best Re-Imagined: Sweatshirt to Skirt Upcycle with a Backstory

Camp memories collage

Collage: Clockwise from left, Me at 9, me now, and sunset over the lake. Text reads “Some memories are best Re-imagined: Sweatshirt to Skirt Upcycle with a Backstory”

I spent my summers from age 7 to age 18 at sleep-away camp in Algonquin Park. It was an incredible place. The girls were on an island, the boys on the mainland. There was a lot of politically incorrect “Indian” business that I really hope has since been corrected but at the same time elicits in me a wistful nostalgia.

Indian Council Ring (2)

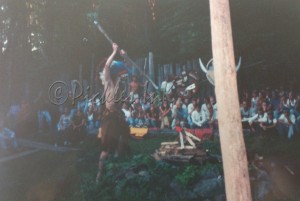
“Indian Council Ring,” in which a lot of rich white kids pretend to be “Indians” and compete in various tests of strength and skill

My brothers, cousins and I were the third generation of our family to attend the camp, which in our modern, disposable world is pretty incredible to think about.

Imagine a beautiful, rustic wilderness setting. No electricity or running water except in the main buildings (and one set of toilets). Freedom, for the most part, from “grown-ups” except for the counselors, who were really just big kids themselves. Spectacular scenery.

Canoing docks in mist (2)

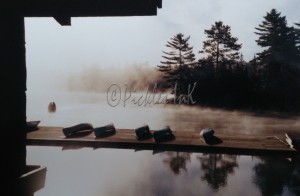
View of the canoeing docks in the morning mist

Activities included arts and crafts, swimming, canoeing, sailing, windsurfing, horseback riding, and a strong focus on true wilderness canoe-tripping – starting at a 4-day trip when I was 7 and working up to, for most campers, the camp’s celebrated “long trips” of between 21 and 50 days in the remote Canadian wilderness.
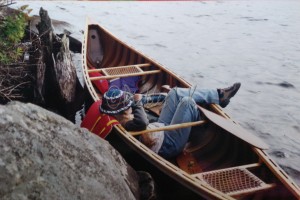
Meg in canoe (2)

Relaxing in a canoe

Now for the flipside: I was an introverted, pudgy asthmatic. I was allergic to horses. I hated mosquitoes. I had passed all the swimming levels I could by the time was 11 and they had nothing else for me to do during the two hours a day of swimming lessons. There were only so many arts and crafts sessions they would let me sign up for. And, to put it quite bluntly, I despised canoe tripping.

Karyn age 9 (2)

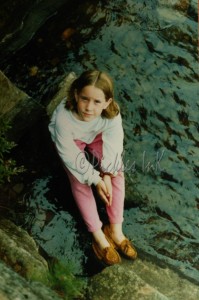
Me, age 9, in my secret reading nook on the water

To me, wilderness excursions are like roller coasters – lots of people love them, and will pay through the nose and wait hours for the opportunity, but me? I can take it or leave it. People think when you say that that you are scared or just inexperienced and the “Aw, c’mon, it’s not that bad, just try it,” is maddening. So when I was a teenager and went to Wonderland, I would always go on Top Gun just once so I could say, “See? Not scared. Just bored. Now if you don’t mind I’m going to grab myself a Slushie and sit in the shade while you guys knock yourselves out standing in line for 2 hours to go around again.”

The same goes for camping. When people ask if I want to go “camping,” usually meaning, “drive to a campground, set up a tent, and roast hotdogs over a fire,” I’ve got to say, “Been there, done that. I can carry a canoe across a 2 km portage and put up an A-frame tent using only sticks, rocks, and 2 paddles, then pack it away again in a roll the size of a loaf of bread. I’m good. I’m going to stick with my air-conditioning and chilled beer, but hey, you guys go nuts.” I absolutely get what people love about it, but it’s just not my cup of tea.

Now that you have a clearer picture of me as a kid, you may understand how my camp experience was less Meatballs and more Lord of the Flies. And that was back before any of this anti-bullying stuff was invented. It wasn’t even called bullying back then – If you weren’t one of the cool kids, it was just life. And I’m not just talking about the other campers. Remember when I said the staff were just big kids? Well, sometimes the biggest kids are the biggest bullies.

I remember learning very early on that there were a lot of “rules” on canoe trip – Official Camp Rules, we were told. Like “camper portions” and “staff portions.” Official Camper Portions were half a pancake each. Official Staff Portions were 3 pancakes (filled with the pannikin-worth of blueberries that the campers were required to pick before they got to eat). Still hungry? Gee, that’s too bad. There’s no batter left. There were Official Camp Rules pertaining to desserts as well – as I understand it, campers were only allowed to eat what dessert remained after the staff were satisfied. Of course, they didn’t like it any more than we did, but what could they do? They didn’t make the rules!

I went on a 7-day trip in Temagami when I was 9 years old. Boy, that trip brings back lots of memories. The elaborate dramas the staff staged for our entertainment, like the one about the escaped axe-murderer from the nearby asylum that the park rangers flew in to warn us about (years later I realized that they had actually landed to caution our staff about too many people sharing a campsite). That charming amateur production ended with one of the male staff racing out of the end of a portage screaming, “GO! GO!” covered in muddy scratch-marks, later explaining that he had been attacked on the trail by a wild, hairy, mud-covered figure, more bear than man, wielding an axe.

Or the one about the man-eating beaver (all right, admittedly, that’s pretty funny now!) over whose dam we were portaging. I was kind of a suspicious 9 year-old, and I sensed something was up when I was hurried along because everyone was waiting for me at the end of the portage. I remember looking across at the slope on the other side of the creek and thinking to myself, “They’re all lined up like they’re sitting at a movie theatre or something,” before I was yelled at to go and join them so we could witness the climax together – the other male staff member racing out, canoe over his head, again covered with mud (stage makeup was hard to come by out there) having “just wrestled himself out of the grip of the rabid creature.”

I don’t think that last one went as smoothly as they planned, so it may have been out of frustration that they involved us campers in the next drama, a playful piece of black humour entitled, “Call the campers over to the staff tent, pin them down, and force-feed them cayenne pepper for shits and giggles.” I kid you not. That actually happened. I kept my lips clamped shut and it still burned for hours. And let me remind you, we were 9 year-old children and these were adults. I told a friend this story as an adult and she said, “Karyn, you realize they were high, right? They had to have been on something.” I think she was probably right.

I think that there was a lack of oversight and compassion at the supervisory level that contributed to the staff resentment which was in turn taken out on the campers. I certainly experienced this during my one and only year as a staff member when I found that days/nights off were generally decided amongst the front-line staff on a “who can get the most people on their side” basis. In my case, at one point, appealing to a higher authority on one occasion did net me grudging permission to take one extra day off to attend my grandmother’s memorial service, provided that I both made up the time doing extra duties later and was back by daybreak the next morning. My older brother was rather uncomfortable dropping me off on the mainland to fulfill this arrangement, but fortunately one of the skills that I had picked up over the years was the ability to quite confidently solo a canoe, in this case across a glassy lake in the middle of the night.

As for my relationships with the other campers, you could to an extent hardly blame them. I certainly didn’t make it easy on myself. Aside from being a moody bookworm, I was also of that compensatorily over-confident non-conformist ilk with an outspoken attitude of “I don’t care if you don’t like me! I don’t have to change myself just to fit in with you jerks.” At school I had a tight-knit anti-clique clique of like-minded folk as a buffer but at camp I was on my own. To be fair as well, there were only a few incidents of actual bullying; it was mostly an over-arching indifference to my presence in general.

There was good stuff too. I think my overall experience would have been better if I hadn’t stayed for so long – I even went back as staff when I was too old to be a camper because it just never occurred to me that I could stop. I met one of my best friends there, and I have skills and memories that many people can only dream of.

Sunset on the lake (2)

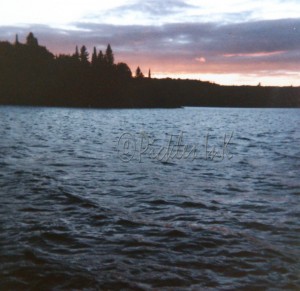
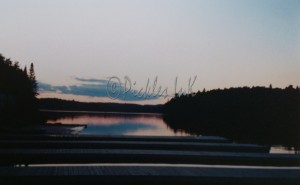
Vintage photo of sunset over the water – taken circa 1987 with a Kodak Instamatic X-15F

Few things can rival the majesty of red pines silhouetted in a Northern Ontario sunset…

Sunset over docks (2)

Another sunset over the water (slightly newer camera)

Or the exhilaration of “bum-sliding” down rapids wearing a life-jacket as a diaper…

Paradise Lagoon (2)

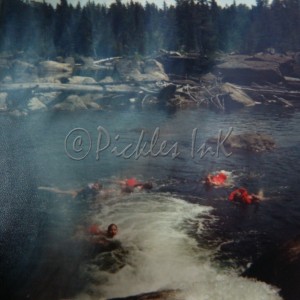
I think this is Paradise Lagoon in Temagami – we would have been jumping off a waterfall into the rapids

…the thrill of leaping off a 20-foot cliff into a deep lake…

Cliff jumping (2)

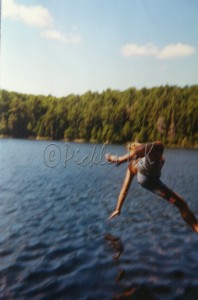
This would be Little Island, Little Island Lake, in Algonquin. There was a rope swing suspended from a tree atop a 20-foot cliff and you would swing out as far as you could and drop into the water. Frankly it’s a wonder any of us survived childhood.

…or the serenity of watching a wall of rain slowly move in across a lake. All of these experiences together make up who I am today and I wouldn’t trade that for the world.

But in many ways, life is what you make it, and some of those experiences had to be reimagined or reinterpreted before they could become a useful part of that whole – which is a philosophical way of leading into the tutorial part of this post, in which I show you how I turned a zip-neck sweatshirt into an A-line skirt.

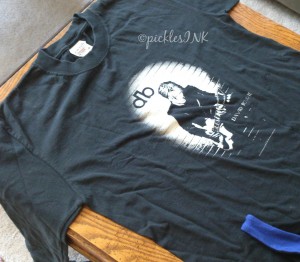
The connection is not quite as tenuous as you might think, as the sweatshirt happened to be my camp staff sweatshirt, which for me symbolized both a link back to that time as well as my symbolic breaking free of whatever hold kept me going there back year after year. For the last 15 years I have hung onto to that sweatshirt but have rarely worn it because I didn’t find it particularly comfortable. It always chafed just a little and never sat quite right.

With this project I took that not-quite-right sweatshirt and turned it into something unique and uniquely suited to me.

Sweatshirt to A-line skirt upcycle

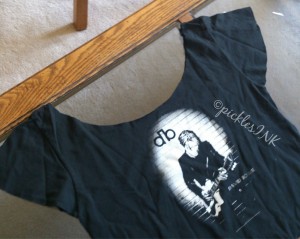
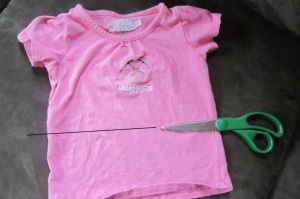
Step 1: Cut sleeves off elastic-waist sweatshirt.

cut off sleeves (2)

Sleeves cut off – check!

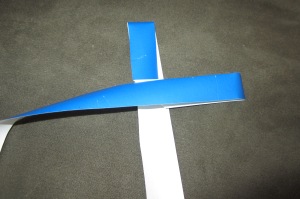
Step 2: Turn sweatshirt inside-out, lay it on a flat surface and place a good-fitting skirt (I like A-line) on top of it, lining up the waistbands.

lined up with skirt (2)

Sweatshirt lined up with skirt (I still need to turn it inside out)

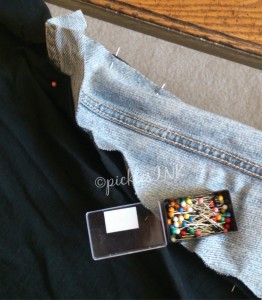
Step 3: Pin the edges of the sweatshirt to match the shape of the skirt.

pinned over skirt (2)

Sweatshirt pinned to match the line of the skirt

Step 4: Trim the bottom of the sweatshirt to your preferred length (the knit material should not need to be hemmed).

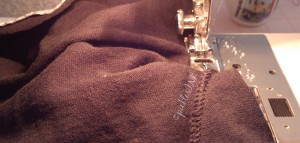
Step 5: Sew the edges along where you pinned and then trim.

Step 6: Turn right side out and try on!

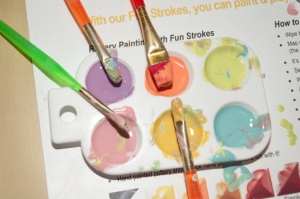
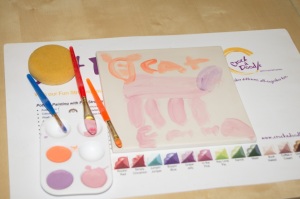
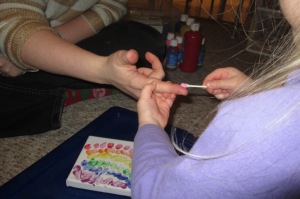
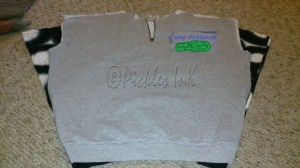
(Optional) Step 7: Embellish or decorate skirt however you like – I used the camp crest and the zipper to create appliquéd pockets by cutting them out and sewing them on around their edges.

appliqued pockets (2)

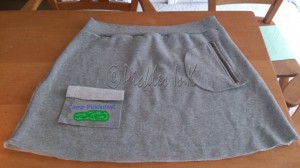
Pockets positioned and ready to be sewn on

Step 9: Wear and enjoy!!

Karyn modeling skirt (2)

Me in my skirt. Have you ever seen a more uncomfortable-looking model?

*Please note that I made a deliberate choice not to identify the camp by name. I am talking about things that happened more than 20 years ago and I understand that they have worked hard to “clean up their act,” so if you happen to recognize it please do not “out” it in the comments.*

What’s ha-pinning?

What, me? NO! I don’t know what you’ve heard, but I would never…NEVER!! I SWEAR!! I mean, probably never… NO! There are FOUR LIGHTS!!! I’ll never crack so OMG JUST STOP ASKING OKAY OKAY OKAY FINE I DID IT I JOINED PINTEREST NOW ARE YOU HAPPY???

How do I feel about Pinterest, you ask? I hate it. HATE IT. In a weirdly irresistible way. Do you remember Choose Your Own Adventures? I despised those books. I would read them through once the way you were supposed to, and then I would go back, choice by choice, to read each of the other possible paths in a logical, step-wise fashion, until I had uncovered all of the possible permutations. Pinterest is one giant, frustrating, inescapable, Choose Your Own Adventure. Trying to take it all in is like, as my big brother so aptly described the internet in 1995, drinking from a fire hose.

As a blogger, I decided that I needed a Pinterest presence, so I joined, but I have composed a Pinterest Code of Conduct  to keep my usage under control:

1. I will NOT travel more than 2 layers deep from any 1 pin (if I click on a pin, and it shows me a board, and I click on another pin on that board, I will NOT go any farther).

2. I will ONLY repin those DIY or craft ideas I can envision myself ACTUALLY DOING in the foreseeable future. Or ever.

3. I will NOT repin a pin without first clicking through to the original link, thus saving myself from the embarrassment of repinning something like this

Water marbles

Screenshot of infamous “water marbles” pin.
©PicklesINK 2013

with the caption, “Water marbles! Crazy how a few kitchen ingredients will make these. Weird, I can’t wait to try,” which when clicked, directs you not to the instructions you are expecting but instead to an article decrying the whole concept as a video hoax.

4. If I try something, and it doesn’t work, I will comment on it to save others the frustration. (WD-40 to clean your burner pans? DOESN’T WORK. Just FYI.)

Signed ______________________

I encourage you to take the Pinterest Pledge too!

Having waded through Pinterest for a couple of weeks, following the rules I set for myself, I do have one amazing success story — yesterday, combining ideas from a couple of pins (how to make a skirt out of a men’s shirt and how to make a child’s dress out of an old t-shirt), I FREAKING MADE A DRESS FOR MOLLY.

My to-do list for this week included:

To-do list

To-do list excerpt:
– learn to sew
– make cool stuff
©PicklesINK 2013

Simple enough, right? I had been looking at tutorials for how to make grown-up tank-top/t-shirt/men’s shirt dresses and got all excited to make one for myself. Then I tried to wrap one of Ian’s old shirts around my waist and realized that for it to work, either my hips had to be a size XXXS or the shirt had to be an XXXL.

New plan: Dress for Molly!

Molly in dress

Molly in upcycled shirt(s) dress.
©PicklesINK 2013

Without further ado, I present to you:

How to make a toddler dress out of a child’s t-shirt and a men’s dress shirt.

Please note I am the most NOVICE of sew-ers so my sewing instructions will be vague and the terminology probably entirely inaccurate.

You will need: scissors, child’s shirt, men’s dress shirt, sewing machine, pins.

???????????????????????????????

Child’s shirt, men’s shirt, scissors (not pictured: sewing machine, pins)
©PicklesINK 2013

1. Cut off the child’s shirt 1″ below where you want the skirt to be attached and cut off the men’s shirt just below the armpits or just below the pocket if there is one.

???????????????????????????????

Where to cut child’s shirt
©PicklesINK 2013

???????????????????????????????

Where to cut men’s shirt
©PicklesINK 2013

2. Sew a gathering seam on the men’s shirt: Set your stitch length to a long setting (4 or 5) and sew a seam all the way around about 1″ below where you cut. Knot one end of both threads and then pull on the other end, sliding the fabric back on the thread to gather it. Gather it until it is the same circumference as the bottom of the child’s shirt and then spread the gathers evenly and knot the other end of the threads. If I’m not explaining this well, Google it or check your sewing machine’s instruction manual, but you probably know how to do it better than I do!

3. Pin the top of the men’s shirt (now the skirt) and the bottom of the child’s shirt (now the bodice) together with the outsides facing in to each other.

???????????????????????????????

The inside of the dress at the waist seam.
©PicklesINK 2013

4. Sew this seam together. I tried to do this with a straight stretch stitch, but I don’t think I was particularly successful (it doesn’t really stretch) and still seams (heheheheh) fine. Now turn it right side out and admire your work!

???????????????????????????????

Finished dress. PRAISE ME!! PRAISE ME!!
©PicklesINK 2013

5. If there is a pocket, and if you want to, carefully detach the pocket from the leftover piece of men’s shirt and reattach it to the skirt (Molly LOVES pockets, so this was the highlight of the dress for her).

6. Show it to everyone you know, either in person or through the use of social media, because you are SEW FREAKING AWESOME!!!! <—- see what I did there??

Who knows? Maybe there’s hope for me and this Pinterest thing after all.

~ karyn

Four lights

There are FOUR lights (Pinterest logo).
©PicklesINK 2013

Molly’s (last-minute) Crock-A-Doodle Birthday Party

Things got a little crazy around Molly’s birthday this year, what with March Break and my mom’s broken hip and all that jazz, so we didn’t manage to plan Molly’s birthday party until a month after her actual birthday. (Poor second-born children, always getting the shaft…)

???????????????????????????????

“Happy Birthday Molly!” message on chalkboard
©PicklesINK 2013

I had glanced at the Crock-A-Doodle pottery-painting website a while ago and put it on the back burner, thinking, “Probably better for an older group,” but then went back to it and decided to give it a shot – Best. Decision. Ever.

???????????????????????????????

Crock-A-Doodle logo on plate glazed with paint choices
©PicklesINK 2013

A birthday party at Crock-A-Doodle includes use of the party room for 1.5 hours, 1 piece of pottery for each guest to paint,

???????????????????????????????

Some of the pieces from which to choose – plates and wands
©PicklesINK 2013

a tile decorated with the birthday child’s handprint and guests’ thumbprints, staff to organize everything and instruct the children (In fact, for older kids, they require the grown-ups to leave – “No, no, we insist! You MUST go and have a coffee and leave the chaos to us!”), and crayons and colouring sheets for children who finish their pieces early.

???????????????????????????????

Ben hard at work painting his ice cream bowl
©PicklesINK 2013

The paint is all washable and non-toxic.

???????????????????????????????

Paint palette with 6 paints and paintbrushes
©PicklesINK 2013

Once everyone is finished painting, you use the rest of the time for food and cake.

???????????????????????????????

Molly blowing out the candles on her pink and purple princess cupcakes!
©PicklesINK 2013

Package pricing is based on 8 participants – if you invite more guests, you pay for each extra piece and if you have fewer, you receive the balance on a gift card.

???????????????????????????????

Friends hard at work on their cereal bowls
©PicklesINK 2013

Once your party is finished, the pieces are labeled with the children’s names, glazed and kiln-fired to a glossy, food-safe finish, packaged, and ready for pick-up in a week to deliver to your guests as a “loot bag” that will last forever!

???????????????????????????????

Finished “cat” tile by Emma
©PicklesINK 2013

The kids all had a great time and made some really lovely artwork. The time flew by – there was just enough time for painting that the kids (aged 3-6) didn’t get bored or frustrated, and then time afterwards for some snacks and cake.

???????????????????????????????

More friends concentrating hard on their pieces!
©PicklesINK 2013

The staff were attentive and knowledgeable and kept things moving along. They were able to gauge the kids’ abilities and let the younger children do their thing while giving the older kids (and parents) tips like how to make polka-dots (you use the wooden end of the paintbrush, FYI). The handprint tile was a great birthday souvenir for our family.

???????????????????????????????

Staff member helping Molly make her pink and purple handprint
©PicklesINK 2013

The whole Crock-A-Doodle party concept was a great fit for us. It was a perfect party for Molly, who loves doing any type of craft, as do most of her friends. For the last few years I’ve been trying to stay away from “treat bags” with lots of little things in them, so the idea that the item they painted became each guest’s take-home treat suited me to a T, and as an incentive to return Crock-A-Doodle throws in a $5 gift-card for each guest.

Finished products

Ben’s ice cream bowl and Molly’s magic wand.
©PicklesINK 2013

Finally, the recyclable tissue paper and paper bags within a reusable shopping bag that everything was packaged in was the sustainable icing on the cake!

Packages 1

Ben and Molly hold up their carefully packaged pieces
©PicklesINK 2013

The cake, by the way, was from Sobeys, which was also a great choice: The cake and icing are yummy, prices are very reasonable, and the bakery only requires 24 hours’ notice. Molly requested pink and purple princess cupcakes, and as you can see, we got exactly that!

???????????????????????????????

Molly’s birthday cake/cupcake combination
©PicklesINK 2013

In sum, I would be all fired up to do another birthday party at Crock-A-Doodle – You might say Crock-A-Doodle is kiln it with this birthday party thing. All in all, Molly was pretty happy with her 3rd birthday party, and that was the most important part!

Handprint tile

Molly shows off her handprint tile (while making a very silly face!)
©PicklesINK 2013

~ karyn

Do you do birthday parties? What has been your favourite idea?

10 Ways to Save the Planet

As parents, we can all relate to Kermit – It’s Not Easy Being Green. We are constantly bombarded with “BUY BUY BUY” messages — You need to get the latest toys! You need to get the DVD as soon as it comes out! Look, this one is EDUCATIONAL! Second child a boy? Well, that pink corn-popper ain’t going to cut it – better pick up a gender-neutral one!

Fisher-Price Corn Popper toy – pink
Photo: http://www.toysrus.ca/product/index.jsp?productId=2688007

And don’t forget to buy NEW CLOTHES NEW WASHCLOTHS NEW RECEIVING BLANKETS NEW SHEETS SOPHIE THE GIRAFFE NEWBORN BABY SHOES AT LEAST 5 PAIRS THE LATEST NURSERY MONITOR TECHNOLOGY AND YOU DEFINITELY NEED THAT WIPES-WARMER BECAUSE THERE’S JUST NOTHING WORSE THAN THE FEELING OF A ROOM-TEMPERATURE WIPE ON YOUR BUM CHEEKS.

Ever since my kids memorized The Lorax I’ve gotten much more in touch with my inner tree-hugger, so in celebration of Earth Day I’ve put together a list of 10 ways that Team Pickles tries to Reduce, Reuse, and Recycle.

"I yam the Yorax! I 'peak for the fwees!" ©PicklesINK 2012

“I yam the Yorax! I ‘peak for the fwees!”
©PicklesINK 2012

  1. When it comes to the 3 R’s of living green, REDUCE should always be at the top of the list. We try as much as possible not to consume too much. I try to always shop with a list — if it’s not on the list, we probably don’t need it, and if I can resist the impulse to buy it right then, I probably won’t miss it!
  2. I try to buy things used as much as I can – partly because I’m CHEAP and partly because it’s more environmentally friendly. Second-hand stores are GREAT sources of books, toys, and clothes for kids and adults. Most sports stores have swap programs which can reduce your costs when it comes to getting your kids involved in expensive sports like skiing or hockey. The exception of course is safety equipment like helmets and carseats, which it is best to buy new or receive used from a source you trust.
  3. Make use of hand-me-downs if you are lucky enough to have friends or family members with kids older than yours, and pay it forward (or back to them) when your kids outgrow the items. For a lot of big-ticket baby items, such as crib mattresses and particle-board furniture, used can actually be healthier than new because they will have finished off-gassing their chemicals into your home’s air.
  4. Buy local! You don’t have to follow a strict 100-mile diet, but as much as you can, buy local and in-season to reduce your carbon footprint and support your neighbours and your local economy. I try to plan meals around what is in season and to shop at my local farm stands and farmer’s markets.
  5. REUSE containers, and use reusable containers — my kids go through A LOT of yoghurt, and I use the empty tubs to freeze things like soups, wine (for cooking! Not winesicles! I swear! Although as ideas go…hmmm), and cooking stock. And if you have the choice, store things in washable containers instead of disposable bags.
  6. Think outside the (craft) box — before you recycle cards or paper, think about whether they might be still be useful. I keep pretty paper scraps, Valentine’s cards, post-cards, etc. in a Ziploc bag in Ben and Molly’s craft cubby for their “cutting and gluing” projects. The scraps can also find new life as grocery lists or even the rough notes for a blog post!
    ???????????????????????????????

    Rough draft of this post on remnants of a Ben and Molly art project.
    ©PicklesINK 2013


  7. Be prepared when it comes to food and travel — I toss snacks and water bottles in my bag for the kids if we’re going to be out for an uncertain amount of time. Apples and bananas are grab and go (and come in their own handy packaging); bagels with cream cheese and plain waffles are easy-to-prepare favourites of my kids as well; and bite-sized crackers and cereal, on their own or in a mix, make great car snacks. (And I’m sure it goes without saying, but of course packaged in reusable containers rather than baggies.) This avoids those grouchy hungry kid meltdowns and saves you money!
  8. REUSE gift bags. Having kids generally means working the birthday party circuit pretty heavily, and I think the same gift bags have been making the birthday party rounds through Ben’s group of friends since they were all born (the friends, not the bags)! Let’s just say I’m pretty sure Ben got a gift last year in a bag that we gave a gift in the year before, and it NOT to the same friend. Now that’s recycling!
  9. On the subject of birthdays, get your kids to make their own birthday cards for their friends (or, in a pinch, use their already made artwork to make a card). It’s fun, inexpensive, green, and personalized. These are two of the cards Molly got for her birthday – Hallmark’s got nothing on these two!

    ???????????????????????????????

    Molly’s handmade birthday cards
    ©PicklesINK 2013

  10. Instill these values in your kids as early as you can. Instead of just saying “No!” to buying that toy at Walmart, explain WHY – because they have so many toys already or because we might find it used at another store without all that plastic packaging that will just go in the garbage. Explain that you are having asparagus for dinner because it is in season, which means it’s growing fresh at the farm right down the road instead of being shipped on a big truck across the country using up fuel and making smog. Have them help you pack up the clothes and toys that they have outgrown and talk about how exciting it is that someone else is going to be able to use them now.

If you get your kids involved and invested early, you’ll soon find that they’re the ones keeping on top of you when it comes to saving the planet!

Happy Earth Day, everyone!

~ karyn

How do you reduce your carbon footprint? If you have kids, do you find it easier or harder since having them?

The Rainbow Connection

I picked up a really lovely book a while back at the Grand River Book Store at the Five Oaks Retreat Centre outside of Paris, Ontario: God’s Dream, by Archbishop Desmond Tutu and Douglas Carlton Abrams.

God’s Dream
Cover art by LeUyen Pham

It’s fitting that I picked it up at the beginning of February, Black History Month, as telling Ben and Molly about Archbishop Tutu sparked a conversation about apartheid and racism. Ben was shocked at the idea that anyone would think that people should be treated differently because of what they look like, citing examples of his friends at school who had different-coloured skin but were just the same as him. We also talked about Archbishop Tutu’s own experience of growing up in South Africa during apartheid and witnessing and experiencing the mistreatment of black people by white people, but always advocating for both change and forgiveness.

God’s Dream comes in both a large hardcover edition with a dustjacket or a smaller board edition; I chose the board book in the interests of durability. The language is simple and the pictures bright and appealing, making the book suitable for children from infancy to school-age. In 28 sentences and 15 illustrations, the book covers love, racism, ageism, diversity, apology, reparation, forgiveness, theism, and universality, delivering as its core message that we are all God’s children, worthy of love and respect, and called to love and respect one another.

The engaging illustrations depict cultural and religious diversity (sadly, as with so many children’s books, it is missing pictures of children with disabilities) and the universal message makes the book relevant to and suitable for families with any theistic worldview not specifically Christianity (or organized religion at all): You could read the story to a group of Muslim, Christian, and Jewish children, for example, and they could each recognize their faith’s core message.

God’s Dream ends with the message that when people fulfill God’s dream by loving one another, “God smiles like a rainbow,” and ends with a picture of a rainbow made up of children’s handprints.

Book illustration

Final page of God’s Dream
Art by LeUyen Pham

Ben and Molly immediately asked if we could do a craft like that, and I suggested that in the interests of size we try fingerprints instead. We started with rainbow-coloured paints in an egg carton…

???????????????????????????????

Rainbow-coloured paints in an egg carton
©PicklesINK 2013

..then took turns painting each others’ fingers with cotton swabs…

???????????????????????????????

Molly painting Ben’s finger yellow
©PicklesINK 2013

…and stamped the painted fingers on the canvas to make the rainbow.

???????????????????????????????

Ben stamping his yellow fingerprints
©PicklesINK 2013

???????????????????????????????

Ben painting Molly’s finger purple
©PicklesINK 2013

???????????????????????????????

Molly painting my finger pink
©PicklesINK 2013

Finished painting

Finished rainbow fingerprint painting on canvas
©PicklesINK 2013

The finished product was a complete team effort and is now proudly displayed on the playroom wall.

~ karyn

Have you read any particularly meaningful children’s books lately? What would you recommend?

How to make 187 palm crosses without completely losing your…ooh, shiny!

Last Sunday was Palm (or Passion) Sunday in the Christian calendar, which commemorates Jesus’ triumphal entry into Jerusalem, where crowds greeted him by waving and covering his path with palm branches, and marks the beginning of Holy Week. Many churches distribute palm branches or fronds for people to wave as part of the worship service.

For our Palm Sunday service, I rashly volunteered to go looking for individual palm strips that could be folded into crosses for Easter. “Who will fold them?” they asked. “Oh, I’ll do it,” I said. “How much work could it possibly be?” *Cue evil laugh track*

After the Palm Sunday service, I came home with the bag of still fresh palm strips and I asked my good friend Google, “Seriously, Google? How hard COULD it be?”

Palm fronds

Bag of (purportedly) 100 palm strips. Actually more like 150 as many of them were made up of 2 layers stuck together.
©PicklesINK 2013

Google replied, “Mwah hah hah hah hah…!” but also helpfully directed me to some instructional websites and I got to work.

I found a lot of the instructions and pictures tough to follow, so I decided to try my hand at making one of my own. Please note that unlike the actual palm strips, the paper I used is blue on one side and white on the other so you see how the folds really go! The wider end of the palm/paper is the bottom and narrower part the top; if it’s really stringy at the top, trim it. If it’s extra wide (more than 1.5″), cut a notch at the bottom and peel the two halves apart to make 2 strips.

Paper palm

Blue strip of paper cleverly trimmed into palm strip shape
©PicklesINK 2013

Fold #1: Fold the top straight down over the bottom at the height that you would like the cross to be (in this case, about 5″).

Fold 1

Fold #1: Fold top down over bottom. From bottom to fold will be the height of your cross.
©PicklesINK 2013

Fold #2: Fold to the right at a 45° angle to start to form the first arm of the cross.

Fold 2

Fold #2: Fold to the right at a 45° angle
©PicklesINK 2013

Fold #3: Fold straight back towards the left to complete that arm and start to form the second arm of the cross.

Fold 3

Fold #3: Fold straight back towards the left.
©PicklesINK 2013

Fold #4: Fold underneath to complete the second arm. The paper/palm should pass behind the cross.

Fold 4

Fold #4: Fold underneath to complete the second arm.
©PicklesINK 2013

Turn over.

Fold 4 over

This is what is should look like when turned over after Fold #4.
©PicklesINK 2013

Fold #5: Holding the cross together in the middle, fold strip at a 45° angle to pass behind cross from top left to bottom right.

Fold 5 flat

Fold #5: Holding the cross together, fold strip at a 45° angle to pass behind cross from top left to bottom right.
©PicklesINK 2013

Fold #6: Fold from bottom right straight across to bottom left (keep holding middle of cross together).

Fold 6

Fold #6: Fold from bottom right straight across to bottom left.
©PicklesINK 2013

Fold #7: Fold up at 45° angle so strip passes behind cross from bottom left to top right.

Fold 7

Fold #7: Fold up at 45° angle so strip passes behind cross from bottom left to top right.
©PicklesINK 2013

Fold #8: Pass top of strip over top right and tuck into where the strip wraps around the bottom of the cross.

Fold 8 and tuck

Fold #8: Pass top of strip over top right and tuck into where the strip wraps around the bottom of the cross.
©PicklesINK 2013

Then pull tight.

Fold 8 and pulled tight

Fold #8 pulled tight.
©PicklesINK 2013

Turn over and trim excess to finish.

Finshed and trimmed

Trimmed, completed cross.
©PicklesINK 2013

Here are some of the real thin, front and back, in various sizes.

Work in progress

Completed palm crosses, front and back.

And here I am with crazy eyes having just spent the last 4 hours making 187 of them!!

Completed (with crazy eyes)

Karyn with crazy eyes and 187 palm crosses in a basket.
©PicklesINK 2013

It was strangely soothing, as repetitive tactile experiences go. When we delivered them to the church, Ian proudly declared, “Oh, it was easy! At least, it didn’t look that hard…”

~ karyn

A Hands-on Valentine’s Day

This year for Valentine’s Day, Ian went all out — babysitter, fancy dinner, executive box seats for the Tragically Hip concert in Toronto, reservations at the swanky Royal York Hotel…not for me, mind you. This was all for work. I, on the other hand, chaired my first ever church committee meeting. But I’m not bitter. Not at all. Jerk. Is what I would call him if I was bitter, which I’m not. At all.

All joking aside, we don’t generally do a whole lot to celebrate Valentine’s Day, but he enjoyed being able to straight-face it at work when people gasped, “Isn’t your wife going to kill you for going out on Valentine’s Day??” And he did send me very beautiful flowers:

With lilies

My beautiful Valentine’s Day flowers!
©PicklesINK 2013

Sadly, I have found that lilies give me migraines, so this morning I performed a lily-ectomy and I think they’re just as lovely without them!

Without lilies

My flowers, just as lovely post-lilyectomy.
©PicklesINK 2013

On my end, I wanted to do some art with Ben and Molly for Valentine’s Day presents for Ian. For the last little while any time I’ve given Molly paints she has happily sat for ages painting her fingers and making prints, so for a Valentine’s Day craft I figured I would tap into and fully sanction that hands on technique! My idea was to make a fingerprint garden with a “Bee Mine” theme.

???????????????????????????????

Ben and Molly’s Valentine paintings for Daddy.
©PicklesINK 2013

Ben was right on board and caught on immediately. I helped him with the stems and started him off on the flowers and he took it from there — “No, mommy, don’t worry. I can do it. I know what I’m doing.” After he finished his flowers I painted the bee on his thumb and we stamped that, and he took it from there, drawing the speech bubble for the bee, the butterfly, and the sun. Can you figure out Ben’s secret trick to drawing butterflies?

???????????????????????????????

Close-up of Ben’s painting of a row of flowers, bee, butterfly, and sun.
©PicklesINK 2013

My independent-minded Molly, on the other hand (heheheheh) made it very clear that she wanted no help, so her version reflects her non-conformist nature! (Didja see what I did there with “nature”??). The “printing” on the easel, I’m told, says, “To Daddy, This is a garden and a bee, Love Molly.”

???????????????????????????????

Close-up of Molly’s painting of a garden with flowers and a bee.
©PicklesINK 2013

Not to be outdone, I also did my part for Valentine’s for Ian — weeks ago I found the perfect card, bought it, snuck it into the house and carefully hid it, and just as soon as I figure out where, I’ll give it to him!

???????????????????????????????

Valentine’s Day swag: My flowers and Ben and Molly’s paintings. Pretend that you can see my card too!
©PicklesINK 2013

I hope that you had a good Valentine’s Day, however you chose to celebrate (or not)!

~ karyn