Tag Archive | DIY

Everyday Elsa: One-hour DIY Elsa costume tutorial

Okay, brace yourself because I know this will come as a shock, but this summer Molly was obsessed with Elsa (I know, right? You never would have guessed!). I decided to earn some preschooler brownie points and get in some sewing practice at the same time, so I designed up an all-season Elsa costume.

At the time I was doing this, Frozen costumes were only available by lottery through Disney stores and on Ebay if you had a spare $600 lying around. As Halloween quickly approaches, they are much more widely available and super-pretty, but nothing beats the feeling of IF I CAN DO THAT I CAN DO FREAKING ANYTHING NOW WATCH ME BUILD A HOMESTEAD AND LIVE OFF THE LAND SKINNING ANTELOPE WITH MY TEETH FOR DINNER that accompanies making your kids’ costumes from scratch. Besides, it’s cheaper and your kids will totally think you’re a superhero. Continue reading

Emergency T-shirt refashion!!!

You know those times when you’re just minding your own business, trying to convince yourself to stop procrastinating and start working, when suddenly your best friend calls you up and is all, “So I just scored free tickets to the grand opening party for the new rock and roll exhibit at the Science Centre with Q107 tonight. Wanna go?” And you’re all, “Well, I really have to work and look after my kids and be a good wife and mom but uh HELLZ YES.”

So. Annoying.

Then I said, “What the hell am I going to wear?”

And she said, “Something rock and roll. Like a concert tee.”

But I was like, “The only concert tee I have is my Bowie shirt and it doesn’t fit.”

So she was all, “Too bad, SUCKAH!!!”

And I was totally, “OH YEAH? YOU WANNA GO? RIGHT NOW, BEE-YOTCH?? THAT’S RIGHT!!”

Then she was all —

All right, fine…that’s not *exactly* how it went, but it pretty much captures the essence of the conversation.

So there I was, faced with a fashion emergency, and there was only one possible answer: “Hie, my good steed – we must away to the land of PINTEREST,” and off I went to my handy T-shirt refashion board for inspiration. One pin was not quite what I was looking for but pointed me in the right direction (see what I did there with “pointed”?), and it was off to the races, or at least the sewing machine…

…and now I’m back to share my simple t-shirt + jeans refashion with you, dear readers!

Rock ‘n’ Roll Concert Tee + Jeans 30 Minute Refashion

(or more like 15 if you’re more experienced than me!)

Too small t-shirt + old ripped jeans = simple 30 minute refashion #DIY www.picklesINK.com

T-shirt + Jeans = 30 minute refashion

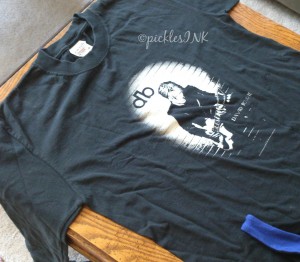
Step 1: Find that one too-small t-shirt that you have kept in your pajama drawer for 10  years even though it has never actually fit because they only had small when you bought and you haven’t been an adult size small since you grew boobs in grade 6 it so it’s wishful thinking to imagine that it will ever be wearable even as PJs because there is basically nothing in the world less comfortable than a too-tight, too-thick long-sleeved t-shirt but you never threw it out because BOWIE, amiright??

Too small t-shirt + old ripped jeans = simple 30 minute refashion #DIY www.picklesINK.com

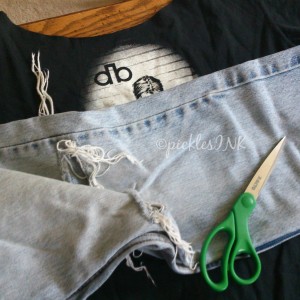
David Bowie concert tee – would ANYONE throw that out??

Step 2: Find the ripped jeans that your big brother was kind enough to donate to your collection of random fabric and other assorted sewing crap.

Too small t-shirt + old ripped jeans = simple 30 minute refashion #DIY www.picklesINK.com

Every pair of my brother’s jeans for the last 30 years has wound up looking like this.

Step 3: Either using a shirt that you like the neckline of as a guide, or just winging it, depending on your comfort level, cut a more flattering neckline than the cross-between-crewneck-and-noose that the shirt came with. Again, using a shirt that you like as a guide if you wish, cut your choice of sleeve (or leave as is). I cut down the long sleeves to a short flutter sleeve. Finally, laying the shirt flat and making sure the sides are even, cut the sides of the shirt open up to just below the armpit seam.

Too small t-shirt + old ripped jeans = simple 30 minute refashion #DIY www.picklesINK.com

I winged it. I like to live dangerously.

Step 4: Okay, there’s 2 ways to do this next part:

EITHER

Measure around your hips (adding as many extra inches as you would like if you want the top to be flowy). Divide that number in half. Measure the width of the shirt, subtracting 1/2 inch for seam allowances (2 x 1/4 inch) Subtract the width of the shirt from the first number. Divide *that* number in half. Flatten the legs of the jeans with the inseam on the edge (I used the inseam because it was more visually interesting). Measure your latest number along the cuff of the jeans from the inseam edge towards the middle, add 1/4 inch seam allowance, and mark it. Measure the length of your cut from the bottom of the shirt to the armpit and add 1/4 seam allowance. Measure along the inseam of the jeans from the cuff up, adding 1/4 inch, and mark. (Are you confused yet?) Using a ruler, draw a line between your two markings and cut along the line. You will now have a right-angle triangle of folded fabric that will form a triangular insert on one side of your shirt. Cut the other jeans leg to match.*

OR

Lay a shirt that you like the fit of (I used a flowy one) on top of your t-shirt. Lay the folded jeans leg, cuff lined up with the bottom of the good-fit shirt and outside seam edge along the edge of the good fit t-shirt, and draw a line on the jeans from the bottom corner to the armpit of the t-shirt you are refashioning. Cut about 1/4 inch outside of that line for seam. Repeat with the other jeans leg. (My sister the quilter is currently going “EEP! EEP! EEP!” at my reckless disregard for exactness.)

Too small t-shirt + old ripped jeans = simple 30 minute refashion #DIY www.picklesINK.com

I think we all know which method I chose.

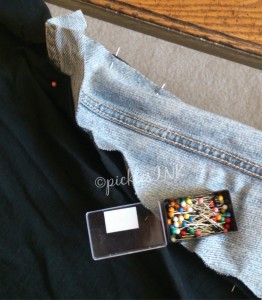
Step 5: Pin the insert  into the shirt, good sides together.

Too small t-shirt + old ripped jeans = simple 30 minute refashion #DIY www.picklesINK.com

Jeans, meet shirt. Shirt, jeans. You might as well get comfy with each other.

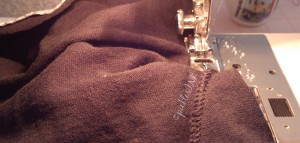
Step 6: Sew the insert in, starting from the bottom. The t-shirt will probably get a little gathered up in the armpit and that’s okay. I did both sides up to an inch or so below the armpit – it gets a little tight in there with the sharp turn, so I finished the rest of the sides before I tackled that, and I went over it a few times for strength.

Too small t-shirt + old ripped jeans = simple 30 minute refashion #DIY www.picklesINK.com

Sew, sew, sew your shirt, gently down the seam…

Voila! Attempt to take a flattering selfie that shows the whole shirt, fail miserably, and ask your neighbour to do it for you.

Too small t-shirt + old ripped jeans = simple 30 minute refashion #DIY www.picklesINK.com

On the left, my super-flattering, Instagram-worthy selfie that sadly doesn’t show the whole shirt. On the right, less flattering but more complete. Can’t win ’em all, right?


Good luck! Let me know how it goes!

~ karyn

*This is not the method I used, so I apologize if it makes no sense at all. I’m making it up. If you are using this method, you are probably better at this than I am and can probably figure out what I meant. Either way, good luck to you. If you do get hopelessly screwed up because of my screwing instruction, please feel free to comment, “You’re a complete jerk, Karyn,” and I will reply with a heartfelt apology.

Vaguebooking was in Vogue Today

I hate Vaguebooking more than many things in life, and I did it all day today, so my apologies to those of you would saw my day bookended by the twin statii

Dear Driver Who Slowed Down to Look as He/She passed Me Lying In the Snow Trying to Dig Out My Car in My Driveway on a Private Road with Only About 30 Residents and then Continued His/Her Merry Way,

You are a jerk.

No love, Me.

and

Quick PSA: When someone is having a complete breakdown in front of you and just barely holding it together because they’ve had a really shitty day and this is the last straw, the appropriate answer is NEVER, EVER “Oooh…well, it could be worse.” Yes, it could be worse. I could be dying of cancer. I could have a splinter in my foot. I could be having my arm gnawed off by a walrus. Yes, things could be worse. But right now, at this moment, for me, it is bad enough. Don’t minimize that.

To clear up the mystery that I’m sure has been haunting each of you all day – “What the heck happened to Karyn today?” I present to you “The Last 12 Hours of My Life” [as in, the 12 hours immediately preceding the time that is now, not to be confused with the final 12 hours of my life, which I hope will take place far in the future].

Prologue: It’s March Break. Ben, Molly and I are up at my parents’ ski chalet, which is on very small, private (as in, not municipally maintained) crescent. There are 20, maybe 30 chalets in all on this road. Ben and Molly are in a ski day camp. Yesterday the weather was balmy. Today there was a massive snow storm.

9:10 AM Realized we had plenty of time. Let Ben and Molly continue playing before getting ready to go.

9:30 AM Told Ben and Molly it was time to get ready to go. They did not share my sense of urgency.

10:00 AM Actually got out the door and into the car. Realized that my decision to park in the middle of the half-circle driveway facing the steeper exit was not my best ever.

10:02 AM Ben: “We’re stuck, aren’t we?” Car: “whuh-ERRRRRRR” Ben: “Yep. We’re stuck.”

10:02-10:30 AM Tried to dig the car out with bare hands and a snow brush.

10:30 AM Abandoned the idea of getting the kids to ski school and sent them inside. Put on mitts. Searched, unsuccessfully, for a shovel. Continued, unsuccessfully, to try to dig car out with snow brush. Watched Jerk #1 drive by slowly.

10:45 AM Gave up and went inside.

12:00 PM Dressed warmly, armed myself with a broom, and went back out to try again.

12:00-12:30 PM Alternated laying on the ground digging under the car with broom handle and trying to rock the car out in reverse. Watched Jerk #2 drive by, slowing down for a good look at the chick lying under her car.

12:30 PM Knocked on neighbours’ door.

12:30-1:00 PM Lovely older couple with much better tools than my broom and snow brush dug the car out. With me and her pushing, he successfully backed the car out of the snowbank and into the snowbank on the other side of the driveway.

1:00-1:10 PM Dug the car out of that snowbank and pushed it up onto the road.

1:15 PM Loaded the kids into the car and took them up to the hill for their afternoon session.

1:45 PM Molly refused to ski.

2:50 PM Put Molly into the car and tried to pull out of parking space. Stuck. For once someone ACTUALLY STOPPED and pushed me out. Yay!

3:00 PM Picked Ben up and drove back down the hill. Discovered that the entrance to the private road had been blocked by the municipal plow. Tried to dig it out with Ben’s ski. Municipal plow drove by, presumably laughing at me.

3:15 PM Drove back up to the ski hill and explained the situation, and asked to borrow a shovel. Lady at the desk said, “Oh my! You’re about to have a breakdown, aren’t you?” Burst into tears. She had a girl take me out to find the shovel. Girl said comfortingly, “Oh, well…it could be worse though.” I said, “True. I could be facing charges for having kicked in your stupid teeth, you utter moron… Uh-huh.”

3:25-3:40 PM Shoveled out the road, stopping to give thumbs up to Jerks #3-12, who drove by without stopping. Special honourable mention to Giant Jerkwad Supreme in the pick-up truck with the plow attachment who could have done it for me in one pass. Drove home to the chalet. Backed into parking space. Pretty sure I’m stuck again but no longer care.

3:45 PM Phoned Municipal Public Works office and was assured that blocking in the private road was standard practice, as was ignoring motorists stranded by the aforementioned action. “If the plow driver stopped to help ever stranded motorist, we’d never get the roads cleared.” Hung up on him. Got a big cuddle from Ben. Felt marginally better.

4:00 PM My mom called. She agreed that John from Public Works was a dick and all the people who didn’t stop were jerks. Felt somewhat better.

4:15-5:30 PM Chatted with friends and received “likes” on Vaguebook. Felt significantly better.

5:30 PM Built a fire and toasted and ate 1 bag of marshmallows (with the help of the kids). Felt quite a lot better but now slightly ill.

9:10 PM Finally was able to see the humour and wrote this post.

Epilogue: In conclusion

1. Yes, it definitely could be worse. I have a pretty awesome life, and at no point was I or any of my loved ones in danger of losing it. But still, sometimes things suck and you get upset…and whatever has caused it, telling a person who is upset about their particular circumstances, “It could be worse,” is not comforting, it is invalidating and minimizing. So if, “smack upside the head to give perspective,” is what you’re going for, then by all means, say that, but if you’re aiming for “comfort and console,” try a simple, “That sucks. I’m sorry.”

2. People are stupid jerks, but it’s nothing a roaring fire and a bag of toasted icing sugar, artificial vanilla flavouring, and gelatin can’t fix.

~ karyn

breakdown picture

Text reads: “If someone is having a breakdown in front of you because they’ve had a really shitty day and this is the last straw, the appropriate answer is NEVER, EVER “Oooh…well, it could be worse.” Yes, it could be worse. I could be dying of cancer. I could have a splinter in my foot. I could be having my arm gnawed off by a walrus. But right now, at this moment, for me, it is bad enough. Don’t minimize that.”


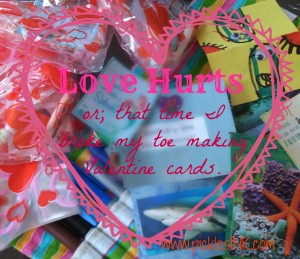
Love Hurts

I broke my toe making Valentines cards.

No, wait…I can’t really start there. You need more context than that. I broke my toe because of my ovarian cyst, which is not complex, just misunderstood, like me in high school.

Actually, I’d better go back a bit further. Really, it all started because Ian bought those damn Valentines treat bags at the Liquidation World closing sale, so when it comes down to it, I blame the economy. I broke my toe because of the economy. Damn you, Stephen Harper!

Love hurts logo

Love Hurts
or; that time I broke my toe making Valentine cards

I’m feeling a little bit pulled in all directions lately, mostly because of things that I have taken on myself and therefore for which I have only myself to blame…the new job*…the old job**…the old chair position***…the new chair position****… For the most part I’ve been managing to keep my head above water, and this Sunday I finally got through the stressfullest bit, which was chairing the church’s Annual Meeting. By the grace of…well…chocolate (true story!) I made it through and it was pretty successful, if I do say so myself.

Between my own work and extracurriculars, and Ian’s work craziness (transitioning to new ownership by a much bigger company with very different corporate style, meaning even longer hours and more travel than before)…and the fact that my beloved first car Spunky (RIP) bit the big one last week, necessitating a day of car shopping…&tc…&tc…suffice it to say, my house is a disaster, we are subsisting on the leftover party-sized pizza we brought home from church on Sunday, and Ian is away yet again.

On top of that, Ben’s moods and behaviour have been a complete nightmare lately, Molly’s behaviour hasn’t been much better, and I’ve also been having this fun crippling abdominal pain which turned out to be my not-so-complex bloody ovarian cyst (literally bloody; ‘haemorrhagic,’ technically).

So this morning, when I really should have been working my little medical transcriptionist heart out, I confessed to my wonderful support group of invisible interweb blogging friends that when I learned I had this (originally wrongly described) complex cyst, a small part of me couldn’t help but wish that it was just a little more on the complex side. Nothing terminal of course; just maybe serious enough to put me out of commission just long enough for it to be socially acceptable to expect people to come in, clean my house, look after my kids, and cook me a couple of nice dinners.

Well, there went the morning – we laughed, cried, commiserated, laid the groundwork for a proposed tropical paradise sister-blogger-wives commune, and I’m pretty sure conspired to transport questionable substances across state lines. It was just what I needed. My friend Lizzie over at Considerings calls these sorts of people her ‘lifeboats’ and that’s exactly what I needed and exactly what I got (Mel, Jenn, and David, that includes you too).

Thus refreshed, I looked at the clock and realized that it was well beyond when I needed it to be and I still had to get to Ben’s school to pick him up for his doctor’s appointment to talk about stopping the medication that was hopefully the source of the drastic mood swings and anxiety that had made him particularly difficult to parent lately.

And it was at that very moment that I thought to myself, “This is the perfect time to make Valentines!”

A few weeks ago, Ian took Molly to Liquidation World to check out the store-closing sale and impulse-bought thoughtfully purchased several items, including very reasonably priced cellophane Valentine treat bags. Now under normal circumstances, this would have been perfectly fine – welcome, even – but given my fragile mental state in the context of the tornado of crazy that is my life right now, these GOD-DAMN TREAT BAGS have become the apex of my stress mountain – the one thing in my life that should be so absolutely simple (Use them. Don’t use them. Toss in a lollipop and call it a day. Pretend I can’t remember where I put them. So many nice, easy possibilities!) but instead has become the thing on which I have fixated ALL of my stress because I simply cannot allow said stress to affect the delicate balance of all the other balls I am just barely managing to keep in the air.

Saturday night, at Walmart: I need chocolate for the Annual Meeting (put chocolate hearts in cart). I should pick up Valentines for the kids (start looking at Valentines). Princess Valentines that come with bracelets – check! (put in cart) Angry Birds? No, Ben did Angry Birds last year. Bugs with sticky bug cling things – that works (put them in basket). Wait, then I have to get stuff to put in the treat bags. Okay…heart stampers (into basket). Pencils (into basket). I should get candies. More chocolate heart candies? But I don’t know if they’re peanut-free (look through all Valentine candies for peanut-free symbols, then reject them all on the basis of price anyway). But if I’m getting stuff to put in the treat bags, I shouldn’t just get the Valentines that come with useless crap that’s going to get thrown out anyway. I could get the cheaper Valentines that don’t come with things (put away other Valentines). Okay, so Princesses without bracelets for Molly. Jake and the Neverland Pirates for Ben? (put in basket). I don’t know though…he likes Jake, but I don’t know if he likes it enough for Valentines (put them back). Maybe I should let them choose their own cards (put the Princess ones back too). I really wanted to do that Pinterest thing with the fish candies. I wonder if they have them in the regular candy section (go all the way back through Walmart. Don’t find fish candies). I could check the dollar store. Actually, I could get stuff for the treat bags there too (put it all back and just buy the chocolates).

Monday afternoon: Take kids to the dollar store and pick out candies to put in treat bags. Foolishly mention to Ben that I had wanted to find banana or fish candies to do a Despicable Me or undersea-themed Valentine. Ben decides to hand draw all of his Valentines with minions and sea creatures. Molly wants hers to have princesses and rocks.

Monday evening: Second guess doing treat bags at all. Do I really want to be THAT mom?

Tuesday morning: Decide to go to the bulk food store after Ben’s appointment to look for banana or fish candies. Resolve (again) to be THAT mom.

Tuesday lunchtime: Decide that NOW is the appropriate moment to make a test-run of Despicable Me Valentine cards, on the off chance that we do find banana candies at the bulk store (but they won’t be individually wrapped. I would let my kids eat them, but I don’t know about all the other parents. Is this just a waste of time and effort? Are half of them just going to wind up in the garbage? Do I really want to be THAT mom?)

And that is how, as I ran back to the craft corner to get the black marker I had forgotten when I brought the rest of the craft supplies to my desk to make a test batch of Valentines before I raced to pick Ben up in time for his doctor’s appointment, I came to catch my foot on the leg of the couch and collapse in a writhing, gasping, broken-toe-gripping heap on the floor.

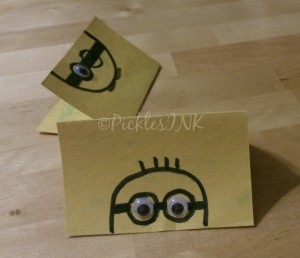
The Valentines turned out well though!

Minion Valentine

Minion Valentines 

*In December I started working as a copywriter for a communications company. It sort of fell into my lap in the form of an offer I couldn’t refuse; Just as I had started to wrap my head around the fact that I was enjoying this whole writing gig and could maybe potentially see myself entertaining the possibility of vaguely dreaming about doing it professionally, the husband of an old friend called and said, “Hey, any chance you want a job as a copywriter?”

**I work from home doing medical transcription, which basically means I can type really fast and my spell-checker knows a lot of words you’ve never heard of.

***A year ago I unwittingly became chair of the Worship Committee at my church. Easy-peasy.

****And then I became chair of the whole shebang. Less easy-peasy.

Eating My Words Instead of My Treats – Halloween Safety Part 2

You may have noticed that I titled my previous post “Part 1.” Part 2 was supposed to be a snarky look at the rest of the usual Halloween safety tips flipped around like that  “How to Prevent Sexual Assault” meme (“If you see an unconscious woman, don’t rape her”) to put the onus on the grown-ups: So “Put reflective tape on your costume so cars don’t hit you” becomes “If you see kids in costumes on Halloween night, don’t hit them with your car, or better yet, don’t drive your car on Halloween night if you don’t have to.”

I know, I know – it needed work, but in my head it had potential.

Eating my words

Scary Jack-O-Lanterns. Text reads: Eating my Words Instead of Treats

Then my best friend’s mom went and died unexpectedly on Sunday night and suddenly not only did I lose all ability to think in terms of funny but all of my previously hilarious lines about there being no good reason to drive around on the one night of the year when you know there are going to be lots of children crossing the road suddenly became really assholey. An afternoon funeral, as it turns out, is a quite compelling reason for a large number of cars to be on the road at just such a time.

So instead of that post, I want to recognize my friend Jenn, who has faced an unspeakably horrible situation with an unimaginable amount of grace and courage. If you happen to have a few extra dollars burning a hole in your pocket, consider making a donation to Lupus Ontario in honour of her mom.

And now for some gratuitously adorable Halloween pictures:

Ben's pumpkin lookalike

Ben holding his pumpkin Doppleganger

The instructions from Farmer Charles on Molly’s school field trip were to select a pumpkin that looked like your head, so Ben brought him that one for inspection.

Ben and Molly and I “carved” pumpkins with the help of Ian’s power drill*, several chisels, and our 8 year-old neighbour Rebecca – air quotes because mostly Ben rode his bike and Molly supervised Rebecca’s pumpkin-gut-scooping. Rebecca very kindly helped Molly draw her pumpkin faces and Ben did his own.

Pumpkin collage

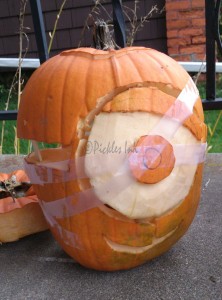
Clockwise from top left: Minion pumpkin, scaaaaarry pumpkins (ooooOOooooOOOooo), and Ben holding the “pumpkin doorstop”

Ben: “MOMMY!! I WANTED TO USE THE KNIFE!! Our Halloween safety rules from school said, ‘make sure a grown-up is WITH you when you carve it,’ NOT, ‘the grown-up should do it FOR YOU!!”

***

Rebecca: “I’m trying to make it look like a kid drew it.”

Me: *raises eyebrows*

Rebecca: “I mean, a LITTLER kid.”

***

Ben: “How do you make a SCARY pumpkin face?”

Molly: “You say, ‘OooooOOooOOOOOooo,’ while you draw it.”

***

Me: “OW!”

My brother James: “Careful. That’s probably sharp. It is a chisel, you know.”

Me: [redacted]

***

Ian: “Oops.”

Me: [also redacted]

Repaired pumpkin

Close-up of the minion head, the reason for the “oops.”

And finally, my split-personality minion Ben (heralded by the grade eights at his school as “OMG THE BEST COSTUME EVER”*) and Molly, who was,  “Uh…Pinkalicious. No, a fairy. No, a fairy princess. No, a pink princess fairy. No, Pinkalicious dressed as a fairy princess with a pink tiara. No, not Pinkalicious OR a fairy OR a princess OR a pink fairy princess – AGNES from Despicable Me. No, NOT Agnes. A pink fairy princess with fairy wings but NOT Pinkalicious dressed as a fairy. No, a fairy princess. But not with fairy wings. Just a princess. Rapunzel.”

Minion and Rapunzel

Minion(s) Ben and Rapunzel Molly

~ karyn

*Next year, jigsaw.

**For the DIYers out there – the minion costume is a collapsible laundry hamper from IKEA, purple and yellow felt, mason jar screw-top lids, purple tulle, denim overalls, black pleather pants** cut and pasted to be overalls, 2 pairs of kids shoes, gloves, and various other bits and bobs. I cut the lid out of the hamper and cut arm holes. Everything is secured with staples, safety pins, and/or hot glue (no sewing required). Ben is dressed as a minion underneath as well with overalls, yellow sweatshirt, and a crocheted minion hat courtesy of the fabulous Ingrid at Loveable Stitches (full disclosure: I’m also at Loveable Stitches. Check us out!)

***Size TWO pleather pants that I found second-hand at Once Upon a Child. WHO MAKES PLEATHER PANTS FOR TWO-YEAR-OLDS?? AND WHO BUYS PLEATHER PANTS FOR THEIR TWO-YEAR-OLD???****

****Okay, fine. Yes, *I* would probably buy pleather pants for my two-year-old. Are you happy now?

Some memories are best Re-Imagined: Sweatshirt to Skirt Upcycle with a Backstory

Camp memories collage

Collage: Clockwise from left, Me at 9, me now, and sunset over the lake. Text reads “Some memories are best Re-imagined: Sweatshirt to Skirt Upcycle with a Backstory”

I spent my summers from age 7 to age 18 at sleep-away camp in Algonquin Park. It was an incredible place. The girls were on an island, the boys on the mainland. There was a lot of politically incorrect “Indian” business that I really hope has since been corrected but at the same time elicits in me a wistful nostalgia.
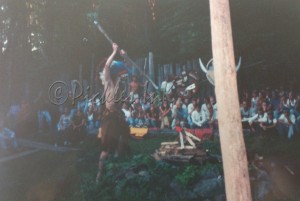
Indian Council Ring (2)

“Indian Council Ring,” in which a lot of rich white kids pretend to be “Indians” and compete in various tests of strength and skill

My brothers, cousins and I were the third generation of our family to attend the camp, which in our modern, disposable world is pretty incredible to think about.

Imagine a beautiful, rustic wilderness setting. No electricity or running water except in the main buildings (and one set of toilets). Freedom, for the most part, from “grown-ups” except for the counselors, who were really just big kids themselves. Spectacular scenery.

Canoing docks in mist (2)

View of the canoeing docks in the morning mist

Activities included arts and crafts, swimming, canoeing, sailing, windsurfing, horseback riding, and a strong focus on true wilderness canoe-tripping – starting at a 4-day trip when I was 7 and working up to, for most campers, the camp’s celebrated “long trips” of between 21 and 50 days in the remote Canadian wilderness.
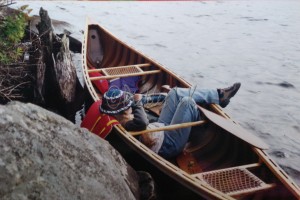
Meg in canoe (2)

Relaxing in a canoe

Now for the flipside: I was an introverted, pudgy asthmatic. I was allergic to horses. I hated mosquitoes. I had passed all the swimming levels I could by the time was 11 and they had nothing else for me to do during the two hours a day of swimming lessons. There were only so many arts and crafts sessions they would let me sign up for. And, to put it quite bluntly, I despised canoe tripping.

Karyn age 9 (2)

Me, age 9, in my secret reading nook on the water

To me, wilderness excursions are like roller coasters – lots of people love them, and will pay through the nose and wait hours for the opportunity, but me? I can take it or leave it. People think when you say that that you are scared or just inexperienced and the “Aw, c’mon, it’s not that bad, just try it,” is maddening. So when I was a teenager and went to Wonderland, I would always go on Top Gun just once so I could say, “See? Not scared. Just bored. Now if you don’t mind I’m going to grab myself a Slushie and sit in the shade while you guys knock yourselves out standing in line for 2 hours to go around again.”

The same goes for camping. When people ask if I want to go “camping,” usually meaning, “drive to a campground, set up a tent, and roast hotdogs over a fire,” I’ve got to say, “Been there, done that. I can carry a canoe across a 2 km portage and put up an A-frame tent using only sticks, rocks, and 2 paddles, then pack it away again in a roll the size of a loaf of bread. I’m good. I’m going to stick with my air-conditioning and chilled beer, but hey, you guys go nuts.” I absolutely get what people love about it, but it’s just not my cup of tea.

Now that you have a clearer picture of me as a kid, you may understand how my camp experience was less Meatballs and more Lord of the Flies. And that was back before any of this anti-bullying stuff was invented. It wasn’t even called bullying back then – If you weren’t one of the cool kids, it was just life. And I’m not just talking about the other campers. Remember when I said the staff were just big kids? Well, sometimes the biggest kids are the biggest bullies.

I remember learning very early on that there were a lot of “rules” on canoe trip – Official Camp Rules, we were told. Like “camper portions” and “staff portions.” Official Camper Portions were half a pancake each. Official Staff Portions were 3 pancakes (filled with the pannikin-worth of blueberries that the campers were required to pick before they got to eat). Still hungry? Gee, that’s too bad. There’s no batter left. There were Official Camp Rules pertaining to desserts as well – as I understand it, campers were only allowed to eat what dessert remained after the staff were satisfied. Of course, they didn’t like it any more than we did, but what could they do? They didn’t make the rules!

I went on a 7-day trip in Temagami when I was 9 years old. Boy, that trip brings back lots of memories. The elaborate dramas the staff staged for our entertainment, like the one about the escaped axe-murderer from the nearby asylum that the park rangers flew in to warn us about (years later I realized that they had actually landed to caution our staff about too many people sharing a campsite). That charming amateur production ended with one of the male staff racing out of the end of a portage screaming, “GO! GO!” covered in muddy scratch-marks, later explaining that he had been attacked on the trail by a wild, hairy, mud-covered figure, more bear than man, wielding an axe.

Or the one about the man-eating beaver (all right, admittedly, that’s pretty funny now!) over whose dam we were portaging. I was kind of a suspicious 9 year-old, and I sensed something was up when I was hurried along because everyone was waiting for me at the end of the portage. I remember looking across at the slope on the other side of the creek and thinking to myself, “They’re all lined up like they’re sitting at a movie theatre or something,” before I was yelled at to go and join them so we could witness the climax together – the other male staff member racing out, canoe over his head, again covered with mud (stage makeup was hard to come by out there) having “just wrestled himself out of the grip of the rabid creature.”

I don’t think that last one went as smoothly as they planned, so it may have been out of frustration that they involved us campers in the next drama, a playful piece of black humour entitled, “Call the campers over to the staff tent, pin them down, and force-feed them cayenne pepper for shits and giggles.” I kid you not. That actually happened. I kept my lips clamped shut and it still burned for hours. And let me remind you, we were 9 year-old children and these were adults. I told a friend this story as an adult and she said, “Karyn, you realize they were high, right? They had to have been on something.” I think she was probably right.

I think that there was a lack of oversight and compassion at the supervisory level that contributed to the staff resentment which was in turn taken out on the campers. I certainly experienced this during my one and only year as a staff member when I found that days/nights off were generally decided amongst the front-line staff on a “who can get the most people on their side” basis. In my case, at one point, appealing to a higher authority on one occasion did net me grudging permission to take one extra day off to attend my grandmother’s memorial service, provided that I both made up the time doing extra duties later and was back by daybreak the next morning. My older brother was rather uncomfortable dropping me off on the mainland to fulfill this arrangement, but fortunately one of the skills that I had picked up over the years was the ability to quite confidently solo a canoe, in this case across a glassy lake in the middle of the night.

As for my relationships with the other campers, you could to an extent hardly blame them. I certainly didn’t make it easy on myself. Aside from being a moody bookworm, I was also of that compensatorily over-confident non-conformist ilk with an outspoken attitude of “I don’t care if you don’t like me! I don’t have to change myself just to fit in with you jerks.” At school I had a tight-knit anti-clique clique of like-minded folk as a buffer but at camp I was on my own. To be fair as well, there were only a few incidents of actual bullying; it was mostly an over-arching indifference to my presence in general.

There was good stuff too. I think my overall experience would have been better if I hadn’t stayed for so long – I even went back as staff when I was too old to be a camper because it just never occurred to me that I could stop. I met one of my best friends there, and I have skills and memories that many people can only dream of.

Sunset on the lake (2)

Vintage photo of sunset over the water – taken circa 1987 with a Kodak Instamatic X-15F

Few things can rival the majesty of red pines silhouetted in a Northern Ontario sunset…

Sunset over docks (2)

Another sunset over the water (slightly newer camera)

Or the exhilaration of “bum-sliding” down rapids wearing a life-jacket as a diaper…

Paradise Lagoon (2)

I think this is Paradise Lagoon in Temagami – we would have been jumping off a waterfall into the rapids

…the thrill of leaping off a 20-foot cliff into a deep lake…

Cliff jumping (2)

This would be Little Island, Little Island Lake, in Algonquin. There was a rope swing suspended from a tree atop a 20-foot cliff and you would swing out as far as you could and drop into the water. Frankly it’s a wonder any of us survived childhood.

…or the serenity of watching a wall of rain slowly move in across a lake. All of these experiences together make up who I am today and I wouldn’t trade that for the world.

But in many ways, life is what you make it, and some of those experiences had to be reimagined or reinterpreted before they could become a useful part of that whole – which is a philosophical way of leading into the tutorial part of this post, in which I show you how I turned a zip-neck sweatshirt into an A-line skirt.

The connection is not quite as tenuous as you might think, as the sweatshirt happened to be my camp staff sweatshirt, which for me symbolized both a link back to that time as well as my symbolic breaking free of whatever hold kept me going there back year after year. For the last 15 years I have hung onto to that sweatshirt but have rarely worn it because I didn’t find it particularly comfortable. It always chafed just a little and never sat quite right.

With this project I took that not-quite-right sweatshirt and turned it into something unique and uniquely suited to me.

Sweatshirt to A-line skirt upcycle

Step 1: Cut sleeves off elastic-waist sweatshirt.

cut off sleeves (2)

Sleeves cut off – check!

Step 2: Turn sweatshirt inside-out, lay it on a flat surface and place a good-fitting skirt (I like A-line) on top of it, lining up the waistbands.

lined up with skirt (2)

Sweatshirt lined up with skirt (I still need to turn it inside out)

Step 3: Pin the edges of the sweatshirt to match the shape of the skirt.

pinned over skirt (2)

Sweatshirt pinned to match the line of the skirt

Step 4: Trim the bottom of the sweatshirt to your preferred length (the knit material should not need to be hemmed).

Step 5: Sew the edges along where you pinned and then trim.

Step 6: Turn right side out and try on!

(Optional) Step 7: Embellish or decorate skirt however you like – I used the camp crest and the zipper to create appliquéd pockets by cutting them out and sewing them on around their edges.
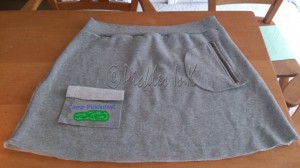
appliqued pockets (2)

Pockets positioned and ready to be sewn on

Step 9: Wear and enjoy!!

Karyn modeling skirt (2)

Me in my skirt. Have you ever seen a more uncomfortable-looking model?

*Please note that I made a deliberate choice not to identify the camp by name. I am talking about things that happened more than 20 years ago and I understand that they have worked hard to “clean up their act,” so if you happen to recognize it please do not “out” it in the comments.*

Mulch Ado About Something – Gardening post #2

Oh my goodness…This post is very, very, very late – It’s now over halfway through July and I’m pretty sure I left it half-finished at the beginning of June. Please imagine very hard that I actually posted these next couple of paragraphs a month ago —>

Gardening post 2 icon

Collage of pictures from post – Hanging plant, brush pile, and kids feeding goat. Caption reads “Gardening #2: Mulch Ado About SOMETHING!”

We’ve been continuing on a roll with our gardening madness. The back yard is almost totally cleared out but the bees are out in force which may *stem* from the fact that our huge privet hedge has just bloomed. The other morning I tried to edge the last of it but I got scared away by all the buzzing and just dumped a couple of bags of mulch and moved on to the front.

I tried my hand (well, foot, and shovel) at dividing my enormous hostas with limited success. I got one out, at least, and naturally couldn’t resist shouting, “HOSTA LA VISTA, BABY!” (I mean, really, who can blame me?)

After that I pruned the corkscrew hazelnut in the middle of the lawn, stopping to ask my neighbour for advice. When I get the energy later I’ll drag a bag of mulch from the back but for now I said *screw* it – this heat is *nuts*.

Corkscrew hazelnut pruned and mulched

Corkscrew hazelnut, pruned and mulched

Then I went to town on the euanamous bushes, which have totally overgrown the front garden. My plan (Well, our plan. We’ve discussed it and it’s *euanamous*) is to cut them back drastically, disentangle them from the other hedges, give them some shape (other than, you know, “giant amorphous blob”), and mulch and plant some lower-growing flowers in front.

I discovered, to my chagrin, a huge pile of dry sticks underneath everything that on closer inspection turned out to be an entire dead euanamous bush – proof, sadly, that the gardener I was paying $50 a visit to for the last 2 years never ventured more than 6 inches into the garden. Ah well. Live and learn.

Brush pile - mid-pruning

Brush pile from front garden MID-pruning. By the end it filled a small trailer.

Ben and Molly and I took an afternoon to check out the plants at our local farmers market, picking out lots of herbs (Ben and Molly are especially partial to lavender and mint), tomatoes, and hot peppers.

Plants from farmers market 1

Plants from farmers market – experimental ground cover, herbs, tomatoes, and peppers.

No trip to that market is complete, of course, without visiting and feeding the animals there – friendly goats, geese, and chickens.

Feeding goats

Ben and Molly feeding the goats – Molly dressed to the nines, as usual!

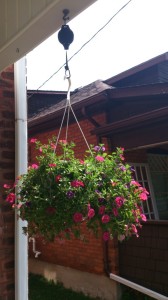
Ben begged for a hanging basket of flowers – “Look mommy! It has a hook, and we have hooks on the front porch! It’s perfect!”  Our neighbour Walt marched over the day after we hung it with a retractable hanger – “Here, Karyn. I’ve had this squirreled waitin’ for someone to get a plant like this. Watcha do is you pull it down and lock it, water it, then send it back up.” Ben immediately declared that it is now HIS job to water it since Walt gave him the hanger just so  he could reach it.

Hanging plant

Ben’s prized hanging plant – “Look, Molly! It’s pink! Your favourite colour!”

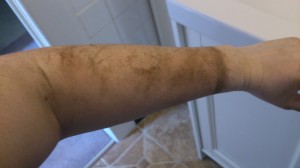
A few days later, on what turned out to be the hottest day of the summer so far, I decided to try to dig out that euanamous stump. It took me 2 hours and was the dirtiest job I’ve ever done, but boy did I ever feel like a superwoman when I finished. It’s a good think I wore gloves, don’t you think?

dirty arm

Dirty arm – there was dirt on my arms…in my eyes…in my teeth…in my…well, you get the picture.

I think I cemented my reputation with my neighbours, who have been watching approvingly. Ian reported when he arrived home from his 3 days away that Walt had greeted him with, “You know, that wife of yours has been out there all week working her…uh…uh…” “Tail?” “…off all week in this heat. You shoulda seen her!” Another neighbour came over one morning just to tell me how great it looked. Yay! Pat on the back for ME!

Victory is mine

I conquered the stump!! VICTORY IS MINE!!

Once that bastard of a stump was out, we planted a cutting from the forsythia in the backyard in its place. Team Pickles has a little bit of a forsythia obsession that I can’t explain…Okay, fine…it’s my obsession. It’s just such a fun word. Forsythia. Forsythia! FORSYTHIA!!! Now imagine a 3 year-old saying it – see? Awesome. We have a car game in the spring where the first person to see a forsythia while driving yells, “FORSYTHIA!”…and then…well…uh…that’s actually it until someone else sees a forsythia and yells, “FORSYTHIA.” Oh yeah? Well, I think your car games are dumb too!

Ooohkay…moving on.

Walt was also out first thing the other morning edging the front and left me with clear instructions to “Mulch the shit out of it.”

Front garden pruned

Front garden, pruned and mulched.

Heading back to the back yard, I potted (over the course of a couple of HOT weeks) all the tomatoes, hot peppers, basil, and mint. We can’t grow tomatoes or pepper in the ground because there have been black walnut trees in the yard in the past – their roots leave a toxin that affects tomatoes and peppers for decades afterwards.

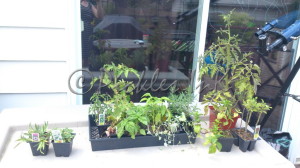
Potted plants

Potted plants – tomatoes, hot peppers, and basil.

Ben and Molly helped me to plant the other herbs (cilantro, lavender, and rosemary) in the garden. I even experimented with more transplanting, moving the clumps of my orange mystery flower – now identified as blanketflower – from the herb garden to other parts of the garden.

Herb garden planted

Finished herb garden – Clockwise from top left are rosemary, cilantro, sage, chives, oregano, lavender

While moving rocks around to edge the back garden, I found a huge ant colony under a flat stone and intrepid photographer Ben ran back in for the camera to document them rushing their eggs underground.

Ants racing underground

Upper left is a purple mystery flower, lower left is the overturned stone (crawling with ants), and upper middle and right you can see the uncovered tunnels and thousands of ants racing to get their eggs underground.

Finally, I planted a couple of groundcover plants in the front, and Walt assures me that all this transplanting will be fine as long as I “water the shit out of it.” I’m starting to see a theme here.

Okay, that brings us to about mid-July. I’ll try to make the next garden post come a bit sooner than this one did so stay tuned!

~ karyn

Stone edging 2

Almost finished back garden – partly mulched and edged with stone.

Stone edging 1

Back yard side garden, mulched and edged with stone.

Pruned, roses and sweet peas in bloom

Back yard side garden, mulched, roses and sweet pea in bloom.

Blooming yellow mystery flower

Back garden, mulched and edged (once the ants were back underground). Yellow mystery flower in bloom.

How are your gardening adventures going? Do you recognize any of my mystery flowers?


What’s ha-pinning?

What, me? NO! I don’t know what you’ve heard, but I would never…NEVER!! I SWEAR!! I mean, probably never… NO! There are FOUR LIGHTS!!! I’ll never crack so OMG JUST STOP ASKING OKAY OKAY OKAY FINE I DID IT I JOINED PINTEREST NOW ARE YOU HAPPY???

How do I feel about Pinterest, you ask? I hate it. HATE IT. In a weirdly irresistible way. Do you remember Choose Your Own Adventures? I despised those books. I would read them through once the way you were supposed to, and then I would go back, choice by choice, to read each of the other possible paths in a logical, step-wise fashion, until I had uncovered all of the possible permutations. Pinterest is one giant, frustrating, inescapable, Choose Your Own Adventure. Trying to take it all in is like, as my big brother so aptly described the internet in 1995, drinking from a fire hose.

As a blogger, I decided that I needed a Pinterest presence, so I joined, but I have composed a Pinterest Code of Conduct  to keep my usage under control:

1. I will NOT travel more than 2 layers deep from any 1 pin (if I click on a pin, and it shows me a board, and I click on another pin on that board, I will NOT go any farther).

2. I will ONLY repin those DIY or craft ideas I can envision myself ACTUALLY DOING in the foreseeable future. Or ever.

3. I will NOT repin a pin without first clicking through to the original link, thus saving myself from the embarrassment of repinning something like this

Water marbles

Screenshot of infamous “water marbles” pin.
©PicklesINK 2013

with the caption, “Water marbles! Crazy how a few kitchen ingredients will make these. Weird, I can’t wait to try,” which when clicked, directs you not to the instructions you are expecting but instead to an article decrying the whole concept as a video hoax.

4. If I try something, and it doesn’t work, I will comment on it to save others the frustration. (WD-40 to clean your burner pans? DOESN’T WORK. Just FYI.)

Signed ______________________

I encourage you to take the Pinterest Pledge too!

Having waded through Pinterest for a couple of weeks, following the rules I set for myself, I do have one amazing success story — yesterday, combining ideas from a couple of pins (how to make a skirt out of a men’s shirt and how to make a child’s dress out of an old t-shirt), I FREAKING MADE A DRESS FOR MOLLY.

My to-do list for this week included:

To-do list

To-do list excerpt:
– learn to sew
– make cool stuff
©PicklesINK 2013

Simple enough, right? I had been looking at tutorials for how to make grown-up tank-top/t-shirt/men’s shirt dresses and got all excited to make one for myself. Then I tried to wrap one of Ian’s old shirts around my waist and realized that for it to work, either my hips had to be a size XXXS or the shirt had to be an XXXL.

New plan: Dress for Molly!

Molly in dress

Molly in upcycled shirt(s) dress.
©PicklesINK 2013

Without further ado, I present to you:

How to make a toddler dress out of a child’s t-shirt and a men’s dress shirt.

Please note I am the most NOVICE of sew-ers so my sewing instructions will be vague and the terminology probably entirely inaccurate.

You will need: scissors, child’s shirt, men’s dress shirt, sewing machine, pins.

???????????????????????????????

Child’s shirt, men’s shirt, scissors (not pictured: sewing machine, pins)
©PicklesINK 2013

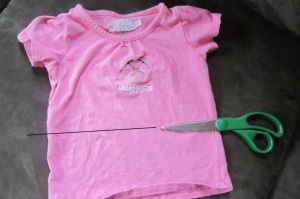
1. Cut off the child’s shirt 1″ below where you want the skirt to be attached and cut off the men’s shirt just below the armpits or just below the pocket if there is one.

???????????????????????????????

Where to cut child’s shirt
©PicklesINK 2013

???????????????????????????????

Where to cut men’s shirt
©PicklesINK 2013

2. Sew a gathering seam on the men’s shirt: Set your stitch length to a long setting (4 or 5) and sew a seam all the way around about 1″ below where you cut. Knot one end of both threads and then pull on the other end, sliding the fabric back on the thread to gather it. Gather it until it is the same circumference as the bottom of the child’s shirt and then spread the gathers evenly and knot the other end of the threads. If I’m not explaining this well, Google it or check your sewing machine’s instruction manual, but you probably know how to do it better than I do!

3. Pin the top of the men’s shirt (now the skirt) and the bottom of the child’s shirt (now the bodice) together with the outsides facing in to each other.

???????????????????????????????

The inside of the dress at the waist seam.
©PicklesINK 2013

4. Sew this seam together. I tried to do this with a straight stretch stitch, but I don’t think I was particularly successful (it doesn’t really stretch) and still seams (heheheheh) fine. Now turn it right side out and admire your work!

???????????????????????????????

Finished dress. PRAISE ME!! PRAISE ME!!
©PicklesINK 2013

5. If there is a pocket, and if you want to, carefully detach the pocket from the leftover piece of men’s shirt and reattach it to the skirt (Molly LOVES pockets, so this was the highlight of the dress for her).

6. Show it to everyone you know, either in person or through the use of social media, because you are SEW FREAKING AWESOME!!!! <—- see what I did there??

Who knows? Maybe there’s hope for me and this Pinterest thing after all.

~ karyn

Four lights

There are FOUR lights (Pinterest logo).
©PicklesINK 2013

Not to toot my own horn, but I am friggin’ SUPERWOMAN!!

A few days back, in the middle of a marathon laundry session, my front-load washing machine started gushing water out of the soap dispenser drawer. I shrieked for help and Molly and Ben raced upstairs and brought me back every towel in the house.*

Now, the last two times I have had appliances break down on me (washing machine and dishwasher), I called a local appliance-fixing guy named Dave, who each time spent about 15 minutes unscrewing a panel, unclogging a hose, and laughing at his own sexist jokes, charged me $300, and left, both times leaving the panel off and saying, “Yer husband can put that back on when he gets home from werk.” I mean, don’t get me wrong, he was nice and all…

So this time I thought, “What the hell? I’ll give it a shot. The worst that happens is I can’t fix it and have to call someone anyway.”

The next step was of course to contact my old pal Google for inspiration. Google said, “Hey babe! Been missing you! We should totally catch up some…what? Washing machine issues? Wow, so much for small talk. Whatever. Anyway, I know this guy…” and turned me on to the most entertaining washing machine repair video ever. No joke. Watch it through to the end.** Awesome, right?
Armed to the teeth with information, I dropped the kids off at school, dug up Ian’s socket set, and went to work. This is the machine, soap dispenser drawer removed. I’ll recap what you already know from watching the best video ever – When you start the wash cycle, water flows from the pipe in the wall into the “ceiling” of the soap dispenser thingy and dribbles through little holes into the soap/fabric softener drawer, then flows out through a hose which feeds into the drum. If the water is coming out the dispenser drawer, it is most likely because that hose is clogged.

???????????????????????????????

Washing machine (right) with soap dispenser drawer removed.
©PicklesINK 2013

The first step is to remove the washing machine cover. There are 3 hex cap screws/bolts (Some of my engineering-inclined readers may have differing opinions on the terminology so I included both. For their clarification, the items in question are threaded with a tapered end and a hexagonal head requiring the use of a socket tool rather than a screwdriver.) on the back of the machine that must be removed, and then the metal lid lifts off.

???????????????????????????????

Washing machine with cover removed. The white rectangle on the left is the top of the soap dispenser.
©PicklesINK 2013

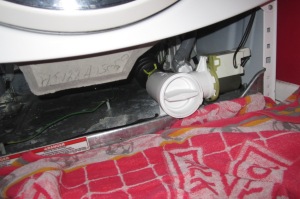
The black rubber hose in the centre plugs into the drum casing but is not attached with any other hardware, so it just pops in and out. I thought at first that was the hose in question, so I pulled it out and checked. It wasn’t clogged so I plugged it back in. Since I thought that was the only hose, I then removed the panel at the bottom of the machine to check the drain trap. A clogged drain usually results in the washing machine just refusing to drain or to start at all, so if you have that problem, make this the first thing you check. It’s a good idea to check it occasionally anyway as a preventative measure.

???????????????????????????????

Bottom panel removed. The white cylinder is the drain trap. Quite a lot of water comes out when you take the lid off it – I needed more than just that one towel.
©PicklesINK 2013

That also required the removal of 3 screws and then a little bit of wiggling before it popped off. The white thing that looks like the Eye of Sauron is the cover of the drain trap. If you twist it anti-clockwise, stinky water will start dribbling and then pouring out, and if you remove it all the way (I recommend putting some sort of container underneath), the rest of the water plus many small objects you never knew you had lost including usually a couple of dollars in very dirty coins will emerge. It’s a good idea to place a fairly large shallow container underneath to catch the water before you open it (unlike I did).

???????????????????????????????

Containers of narsty water, 2 small socks, and several coins.
©PicklesINK 2013

After emptying the drain trap, I put the cover back on, put the soap drawer back in, started the machine, and…as it turns out, I had not in fact solved the problem. Remembering my Youtube friend’s need for a flashlight, a lightbulb went on over my head and I thought, “Eureka! I didn’t check the right hose!”

On closer inspection, there is another, larger hose from the main part of the dispenser that you can’t see from above. I felt around inside (sticking my hand under that white box you see in the second picture and reaching towards the front of the machine) and found it, unplugged it (by feel), and lo and behold, a small, wadded up blue sock fell out, rather the worse for the wear for its adventure.

???????????????????????????????

The hose in question, as seen by my camera and flash.
©PicklesINK 2013

???????????????????????????????

The sock that was at the foot of it all. I toed you I could do it!
©PicklesINK 2013

I stuck a finger through to see if there was anything else (there wasn’t), plugged the hose back in (again by feel), and started her up again, and Ta-da!! Success!! No more gushing water, it only took 45 minutes, and I saved $300 and the possibility of assault charges if Dave-the-repair-guy had made another crack about Ben’s kitchen toys being “women’s tools.”

Then, because I’m a jerk, I sent Ian this text:

Screenshot_2013-05-08-11-01-55

Text reads: So…Um…Remember when I said I thought I could fix the washing machine by myself?

~ karyn

*I hereby confess to a slight degree of plot-enhancing hyperbole. When I told the story to Ian, Ben corrected me. They did not bring me EVERY towel – as he correctly points out, there were still many dishtowels in the kitchen.

**My favourite part is, “I’ll try to find flashlight to see if I show you hose better. Just bear vith me vell I find flashlight…*camera pointing at floor and bumping around* Ah. Here is flashlight. Sorry about the vait.”