Tag Archive | food photography

A Passion For Compassion – #1000Speak

In one of my university social work class there was an intense argument about nature versus nurture – Is empathy innate or learned? As I recall, I took the innate side of the argument then but I’ve since changed my tune. I believe that empathy can and should be taught starting at a young age.

The Oxford Dictionary defines empathy as, “the ability to understand and share the feelings of another,” and Wikipedia notes, “One may need to have a certain amount of empathy before being able to experience compassion.” I think of empathy as the ability to recognize how another person feels and compassion as the drive help them feel better. Both empathy and compassion have been important parts of my life and I feel that they are two of the most crucial interpersonal skills I can pass on to my children.
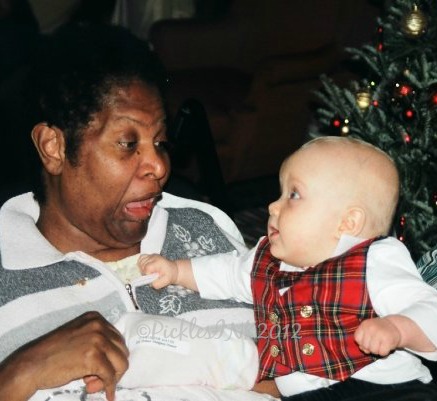
Learning compassion young - baby and disabled woman smile at each other

Ben and Carol grin at each other. Carol was my nanny when I was young. She was disabled by a brain aneurysm and is mostly non-verbal, but she can still make her feelings known!

Continue reading

What’s ha-pinning?

What, me? NO! I don’t know what you’ve heard, but I would never…NEVER!! I SWEAR!! I mean, probably never… NO! There are FOUR LIGHTS!!! I’ll never crack so OMG JUST STOP ASKING OKAY OKAY OKAY FINE I DID IT I JOINED PINTEREST NOW ARE YOU HAPPY???

How do I feel about Pinterest, you ask? I hate it. HATE IT. In a weirdly irresistible way. Do you remember Choose Your Own Adventures? I despised those books. I would read them through once the way you were supposed to, and then I would go back, choice by choice, to read each of the other possible paths in a logical, step-wise fashion, until I had uncovered all of the possible permutations. Pinterest is one giant, frustrating, inescapable, Choose Your Own Adventure. Trying to take it all in is like, as my big brother so aptly described the internet in 1995, drinking from a fire hose.

As a blogger, I decided that I needed a Pinterest presence, so I joined, but I have composed a Pinterest Code of Conduct  to keep my usage under control:

1. I will NOT travel more than 2 layers deep from any 1 pin (if I click on a pin, and it shows me a board, and I click on another pin on that board, I will NOT go any farther).

2. I will ONLY repin those DIY or craft ideas I can envision myself ACTUALLY DOING in the foreseeable future. Or ever.

3. I will NOT repin a pin without first clicking through to the original link, thus saving myself from the embarrassment of repinning something like this

Water marbles

Screenshot of infamous “water marbles” pin.
©PicklesINK 2013

with the caption, “Water marbles! Crazy how a few kitchen ingredients will make these. Weird, I can’t wait to try,” which when clicked, directs you not to the instructions you are expecting but instead to an article decrying the whole concept as a video hoax.

4. If I try something, and it doesn’t work, I will comment on it to save others the frustration. (WD-40 to clean your burner pans? DOESN’T WORK. Just FYI.)

Signed ______________________

I encourage you to take the Pinterest Pledge too!

Having waded through Pinterest for a couple of weeks, following the rules I set for myself, I do have one amazing success story — yesterday, combining ideas from a couple of pins (how to make a skirt out of a men’s shirt and how to make a child’s dress out of an old t-shirt), I FREAKING MADE A DRESS FOR MOLLY.

My to-do list for this week included:

To-do list

To-do list excerpt:
– learn to sew
– make cool stuff
©PicklesINK 2013

Simple enough, right? I had been looking at tutorials for how to make grown-up tank-top/t-shirt/men’s shirt dresses and got all excited to make one for myself. Then I tried to wrap one of Ian’s old shirts around my waist and realized that for it to work, either my hips had to be a size XXXS or the shirt had to be an XXXL.

New plan: Dress for Molly!

Molly in dress

Molly in upcycled shirt(s) dress.
©PicklesINK 2013

Without further ado, I present to you:

How to make a toddler dress out of a child’s t-shirt and a men’s dress shirt.

Please note I am the most NOVICE of sew-ers so my sewing instructions will be vague and the terminology probably entirely inaccurate.

You will need: scissors, child’s shirt, men’s dress shirt, sewing machine, pins.

???????????????????????????????

Child’s shirt, men’s shirt, scissors (not pictured: sewing machine, pins)
©PicklesINK 2013

1. Cut off the child’s shirt 1″ below where you want the skirt to be attached and cut off the men’s shirt just below the armpits or just below the pocket if there is one.

???????????????????????????????

Where to cut child’s shirt
©PicklesINK 2013

???????????????????????????????

Where to cut men’s shirt
©PicklesINK 2013

2. Sew a gathering seam on the men’s shirt: Set your stitch length to a long setting (4 or 5) and sew a seam all the way around about 1″ below where you cut. Knot one end of both threads and then pull on the other end, sliding the fabric back on the thread to gather it. Gather it until it is the same circumference as the bottom of the child’s shirt and then spread the gathers evenly and knot the other end of the threads. If I’m not explaining this well, Google it or check your sewing machine’s instruction manual, but you probably know how to do it better than I do!

3. Pin the top of the men’s shirt (now the skirt) and the bottom of the child’s shirt (now the bodice) together with the outsides facing in to each other.

???????????????????????????????

The inside of the dress at the waist seam.
©PicklesINK 2013

4. Sew this seam together. I tried to do this with a straight stretch stitch, but I don’t think I was particularly successful (it doesn’t really stretch) and still seams (heheheheh) fine. Now turn it right side out and admire your work!

???????????????????????????????

Finished dress. PRAISE ME!! PRAISE ME!!
©PicklesINK 2013

5. If there is a pocket, and if you want to, carefully detach the pocket from the leftover piece of men’s shirt and reattach it to the skirt (Molly LOVES pockets, so this was the highlight of the dress for her).

6. Show it to everyone you know, either in person or through the use of social media, because you are SEW FREAKING AWESOME!!!! <—- see what I did there??

Who knows? Maybe there’s hope for me and this Pinterest thing after all.

~ karyn

Four lights

There are FOUR lights (Pinterest logo).
©PicklesINK 2013

Giving myself a pat on the back

This morning was rough. Ben and Molly clearly woke up on the wrong side of their beds and everything I asked of them was met with flailing, screaming hysterics resistance. Now a year ago, thanks to a mild but chronic chemical imbalance in my brain commonly known as “dysthemia” or chronic depression, I would have been all:

Baby Ben in full tantrum mode
©PicklesINK 2013

But this morning, with the aforementioned chemical imbalance under control, a good night’s sleep under my belt, and my Supernanny and 1-2-3 Magic inspired parenting toolkit in hand, I was all:

Grinning baby Ben
©PicklesINK 2013

So when I told Ben that he couldn’t have his usual morning cereal bar because I was ready to give him his actual breakfast and he screamed, yelled, and hit the table with his hand, I led him to the time-out step and calmly explained that he was sitting out because he had yelled and hit and needed to calm down.

And when I told Molly to go to the bathroom before she finished getting dressed and she refused and collapsed to the floor crying, I told her that if she didn’t go pee before I counted to 3, I would NOT take her underpants off Ben’s head and give them back to her.

Thinking back over the morning routine, of the about 40 minutes of actual routine parts — feeding breakfast, doing bathroom stuff, getting kids dressed and out the door — probably 3/4 of it was spent with one or both of Ben and Molly yelling or crying (NB – I think an early night is in order tonight). But amazingly, in that time I didn’t cry or raise my voice, and what’s even more amazing is I didn’t FEEL LIKE crying or raising my voice.

And the end result was that by the time we were ready to go, Ben and Molly were all:

This is actually Ben and Molly last week when they decided to play a funny joke on me and switch outfits!
©PicklesINK 2013

And I call that a WIN for everyone!

~ karyn

How do you handle it when your kids are melting down? How do you keep your cool?


A ham-tastic series of recipes

My family often eats ham on New Year’s Eve. This year we were up at the chalet and I was in charge of groceries so I (deliberately) went a little overboard and got an enormous bone-in, spiral cut, cooked ham.

For the dinner itself, I heated the ham in the oven and served it with two salads, a green salad with diced apple and celery and vinaigrette, and a chopped cherry tomato and avocado salad with balsamic vinegar and olive oil.

For dessert I made Dump Cake, which is a classic kid-chef-friendly recipe. I’ve seen the recipe a few places with a few variations (ie. adding nuts or chocolate chips), but the basic instructions are: Dump into a baking pan, in this order (without stirring, but try to spread the layers evenly), 1 can undrained crushed pineapple, 1 can fruit pie filling (I used strawberry rhubarb), and 1 box yellow cake mix; top with 2 sticks of butter each cut into 12 slices; and bake for 1 hour at 350°F. It comes out as more of a cobbler than a cake and is absolutely delicious, hot or cold.

When I came home, I had about 2/3 of the ham, including the bone, left, and I have made making the most (so to speak) of the leftovers, and let me tell you, they have been tasting souperheheheh.

I started by cutting the ham off the bone as closely as I could and dicing it. I used about half of that ham to make my first soup, ham, leek, and potato. Sadly, I was engrossed in the process and forgot to take pictures of that one. Please take my word for it – it looked a-FREAKING-mazing.

Ham, Leek and Potato Soup

Ingredients (all amounts are VERY approximate)

  • 3 cups diced cooked ham
  • 3 cups 1/2″ cubed Yukon gold potatoes, unpeeled
  • 3 stalks leeks, finely chopped and WELL rinsed
  • 1 can evaporated milk
  • combination of about 1/3 milk to 2/3 water to just cover ham and vegetables

Cook the leeks and ham in a little bit of oil in large pot until leeks are soft and slightly browned. Dump everything else into the pot. Bring to a boil and then lower to a gentle simmer. Leave it alone for an hour or so. Come back and add some cream and a cornstarch slurry if you like a thick soup. Serve with a really lovely artisanal bread, preferably potato scallion or whole garlic clove or the like.

While that soup was simmering, I used a little bit of the remaining diced ham to make dinner for the kids – “Dora’s Empanadas” from the Dora and Diego Let’s Cook cookbook that Molly got for Christmas from her cousins. Basically, you make a filling out of diced stuff (I used carrots, peas, ham, and grated cheese), cut circles of of refrigerated pre-made pie crust, fill, fold over pastry and seal edges, and bake for 12-14 minutes at 400°F. I put the rest of the diced ham in a large freezer bag and froze it.

Finally, I made ham stock: I put the ham-bone in a large pot, added about a handful each of roughly chopped carrot, onion, and celery and a handful of bay leaves and peppercorns, filled the pot with water, turned on the heat and left it all to simmer for hours and hours and hours. After what was probably actually 2-3 hours, I turned off the heat and left it to cool, then strained it and poured it into containers to freeze. It made about 8 cups of stock in all.

Phew! That was the end of my January 2nd.

The next soup I made was a brilliantly purple concoction that couldn’t be beet! (Okay, I’ll be honest – I did that for comic effect. It was in fact mostly beet.) I rooted around in my vegetable drawer for just the right veggies to roast for it. This thick, winter soup would be just the thing to keep you kale and hearty… All right, I’m done. For now. Here’s the recipe:

Roasted Vegetable Soup with Kale

Ingredients (again, all amounts are VERY approximate)

  • Various vegetables, emphasis on roots – I used beets, carrots, onions, parsnips, and one sad-looking wrinkly zucchini that I found in the back of the crisper – scrubbed, ends trimmed off, peeled if necessary (I peeled the onions, carrots, and parsnips but not the beets), and chopped into large pieces of 1 1/2 – 2 inches
  • mix of ham stock, water, and red wine to cover vegetables (I used about 2 cups ham stock, 1 cup red wine, about 1 cup apple cider and enough water to make up the difference)
  • 3/4 of a bunch of kale, stems included, chopped (I had used the rest in a fettucine carbonara as I couldn’t find basil – also not a bad call)
  • olive oil, salt and pepper, and bay leaves

Dump vegetables except for kale into a roasting pan, drizzle with olive oil and season with salt and fresh-ground pepper. Roast in 450°F oven until soft enough to pierce with a fork, about 45 minutes.

Roasted vegetables

Some of the vegetables post-roasting.
©PicklesINK 2012

Scoop vegetables into large pot. Deglaze roasting pan with a little bit of water to get every last bit of roasty goodness and dump that liquid into the pot too. Add enough ham stock, red wine, cider, and water to cover vegetables. (This could of course be made vegetarian and/or alcohol-free using vegetable stock and/or more cider or other juice.) My ham stock and red wine were both frozen, so I just dumped in the cubes and let them melt on the stove. NB – I freeze my leftover wine before it goes bad. I have seen it suggested that you freeze it in ice cube trays and then store in freezer bags. I tried that and it leaked EVERYWHERE – wine doesn’t freeze completely and the slushy-liquidness will find the tiniest hold in your bag. Now I freeze it in plastic containers.

Roasted veg in pot with ham stock

Roasted vegetables in soup pot with frozen ham stock.
©PicklesINK 2012

Stuff all the kale into the pot on top of the whole mess (Don’t panic – the kale will shrink significantly as it cooks!)

Roasted veg soup topped with kale

Masses of kale covering everything else.
©PicklesINK 2012

Toss in a few bay leaves, put a lid on it, and leave it to simmer for a couple of hours.

Roasted veg soup cooking

Violently purple soup cooking (see how the kale has shrunk to practically nothing)
©PicklesINK 2012

When it looks and smells lovely (assuming you like beets – otherwise, when it looks and smells revolting, but if you don’t like beets I have to question your judgment in making this particular soup as I was pretty up front about the ingredients), puree with a hand blender. It should be really thick and hearty and purple and ready to stain anything it touches. If you don’t have a hand blender, let it cool, then transfer to a blender and puree, then transfer back to the pot and reheat why don’t you? Go to the store right now and get a freaking hand blender because it’s the greatest small kitchen appliance you will ever own, especially if you like making soup.

Roasted veg soup pureed

Pureed roasted vegetable soup
©PicklesINK 2012

Ladle into a bowl, top with something a little sour like sauerkraut, sour cream, plain yoghurt, or blue cheese, and enjoy.

Roasted veg soup with sauerkraut

Roasted Vegetable soup topped with sauerkraut
©PicklesINK 2012

Try not to eat it all in one sitting, though, because there is a curious physiological effect to eating a lot of beets at once. You’ve been warned.

Finally, remembering how when I said, “I have leftover bone-in ham,” my little brother said, “And you’re making split-pea soup, right? WHY AREN’T YOU MAKING SPLIT-PEA SOUP RIGHT NOW?” the final stop on this ham-venture (hmm…weak. Ham-scusion? Ham-Odyssey? No, they’re getting worse. I guess I’d better let sleeping pigs lie) was of course split-pea soup. Especially after Ben saw the last one and said, “Molly, mommy made purple soup! Your favourite colour! Mommy, will you make green soup for me?” I made it on a night that Ian was away because he claims to not like it even though I tell him over and over that all I am saying is give peas a chance…

Anyway, this was the simplest of them all.

Split Pea and Ham Soup

Ingredients

  • split peas
  • ham
  • soup

Fine, I’ll give you more than that:

  • 3 cups dried quick-cooking split peas (I used a mix of green and yellow)
  • 2 cups diced ham (remember that bag of ham I froze?)
  • 8 cups ham stock
Split peas

Dried green and yellow split peas awaiting their
tragic yet delicious fate
©PicklesINK 2012

Rinse and drain split peas and add to ham stock in large pot.

Split peas and ham stock

Split peas and ham stock in my giant soup pot
©PicklesINK 2012

Bring to a boil, then reduce to a simmer. Leave it alone for an hour. Puree a little (leave it lumpy) with your hand blender while whispering lovingly to said blender, “How could I ever have lived without you, my precious?” and then add the ham.

Split pea and ham soup

Mmmm…pot of simmering split-pea and ham soup
©PicklesINK 2012

Simmer a little longer to let all the flavours combine, then serve. It will thicken up quite a lot as it cools and be gorgeous and murky and pea-soupy and delicious.

Split pea soup in bowl

Bowl of hearty green split-pea and ham soup
©PicklesINK 2012

My notoriously picky eater, Ben (who has actually come A LONG WAY in the last few months) said, “Mommy, what are you making for dinner? It smells really yummy,” when he got home from school, and on tasting it, pronounced, “Mmm! This is really good! I LOVE this soup! Did you hear what I said? I don’t just like it, I love it!!” Molly said decidedly, “I DON’T like it,” and then proceeded to scrape her bowl clean before Ben was halfway through his.

I call that a win all around!

Sadly, I am now out of ham stock until I invest in another basketball-sized lump of pink goodness.

~ karyn

Have you made it through your holiday leftovers? What did you do with them?


I think I need a holiday from my holiday!

I think our Christmas season this year was the busiest EVER. There was lots of fun, family and friends, but I think I’m definitely ready for the holidays to be over so I can relax!

Ben and Molly’s school Christmas pageant was a hoot – Ben was dapper as always in his tuxedo and delivered his “Narrator 2” lines in his inimitable fashion. Molly, who had been re-cast as “a star” after (repeatedly) deliberately breaking her fairy wand, demonstrated her displeasure by flinging her bells on the stage and turning her back on the audience for the singing of Jingle Bells.

Ben narrator

Ben delivering his lines wearing his favourite “wedding suit”
©PicklesINK 2012

Molly back turned

Molly with her back to the audience
©PicklesINK 2012

On the Saturday before Christmas we went to our extended family Christmas party with yummy food by The Gravy Train Gourmet Dippery (shameless plug, but seriously, check them out!) and a puppet show by the beautiful and talented Claudia Hurtubise (with special guest puppeteers Ben and Molly).

Check them out and get on board!

On the way to the party, Ian suddenly said, “You know, we have all of their bedtime stuff with us…what do you think the chances are that Nana and Grandad would be convinced to keep them for the night?” I said, “Hmm…if we play our cards right, I’d say at least 50-50.” In the end it did indeed come down to 50-50: My dad hid both car keys and told me to pick a hand – with a hint from my Aunt Bonny, I chose right and Ian and I went to see The Hobbit. Of course, since it was only part 1 of 3 it looks like we’re going to have to make a hobbit of it…

The next morning we were back to the city again for Nana’s office Christmas brunch where we partook of delicious food and an impressive sequence of dirty jokes by and at the expense of friends and family members at our end of the table.

Espresso with  honey lavender Biscotti 
Photo credit: http://www.bakingdom.com

The Christmas Eve family service at St. Paul’s United Church included my cherub choir “singing” The Little Drummer Boy. There was some premature congratulation when the congregation mistook the piano interlude while the kids were given their drums for the end of the song, but we persevered (Translation: I kept desperately waving my arms and and Ben kept singing away loudly a bar ahead of the accompaniment) and brought down the house in the end.

On Christmas Day we spent the morning at home opening presents and Skyping with the overseas Pickleseses and the afternoon at Nana and Grandad’s. Santa, family, and friends were as always very generous to all of us and we enjoyed a delicious turkey dinner as well as the grand opening of Chris’ Epic Present. One of my favourite presents was my mug from my brother- and sister-in-law in Wales!

Blog mug

Keep Calm and Blog mug
©PicklesINK 2012

Finally, on Boxing Day we hosted my family at our house for the afternoon and dinner. I decided on a departure from turkey (for the most part) and served lasagna – one gluten-full and one gluten-free. I made Chef Michael Smith’s lasagna with speedy tomato sauce, which is my go-to lasagna recipe and used Italian turkey sausage instead of pork. For the gluten-free version I shaved thin strips of zucchini with a cheese slicer to use in place of noodles. Both versions were delicious!

I was also very happy with the centrepiece I made using one of the leftover giant vases from Chris and Caitie’s wedding.

Centrepiece 2

Pillar vase filled with Christmas tree ornaments and sparkly pinecones, fruits and leaves.
©PicklesINK 2012

And of course, with so many engineers in the house, I had to make π for dessert.

Pi crust

Cutting out numbers to make my “pi” crust
©PicklesINK 2012

Finished pi

Finished product: Apple cranberry “pi
©PicklesINK 2012

After dinner on Boxing Day, Ben’s big Christmas holiday adventure began as he left with my parents to go up to the chalet for a few days – more on that later!

~ karyn

How were your holidays? Did you follow family traditions, or do something new?

Gee, Karyn, are there any dolls you actually do like??

I’m not all doom and gloom, privilege/oppression/whiteness/and-other-social-work-buzzwords. There are some good options out there if you’re willing to do some digging (or some sewing).

I have a collection of dolls/hand puppets from when I was a teenager called “Treehuggers.” These were, in my opinion, the best rag dolls ever made. You could buy from the catalogue or place a custom order, choosing gender, eye shape (from a selection of buttons), hair colour and texture (yarn – straight, ravelled, dreadlocked, long, short), and skin colour. They also encouraged fine motor development through tie-able shoelaces, button fastenings on the clothing, and  the fact that they could be used as dolls or hand puppets, making them excellent toys for children with special needs. Unfortunately, except for the odd Ebay listing, you can’t get them any more. If anyone reading this has mad sewing skills and wants to go into business, let’s talk!

Treehuggers

My collection of 4 Treehuggers dolls, each with different skin colour, hair colour and texture, and eye shape and colour.
©PicklesINK 2012

Cabbage Patch Kids are still available in black or white and as boys or girls. At the lower price point they have unfortunately gone to the glossy doll-hair but you can get the “original” version through the website for a price. Lots of the older ones are available in thrift stores though.

Ben and Molly's babies: From left, Lissaba, Melissa, Alyssa, and baby with no name.©PicklesINK 2012.

Ben and Molly’s babies:
From left, Lissaba, Melissa, Alyssa,
and baby with no name.
©PicklesINK 2012

There is a line of dolls called “Hearts for Hearts Girls” that is reasonably affordable. Each doll represents different country and comes with a story book, friendship bracelet, web access code, and donation through World Vision to help girls in her country of origin. Unfortunately, in Canada they are exclusive to Walmart, which may turn off some consumers. They only have girls, but that does fit with their concept.

Part of the “Hearts 4 Hearts Girls” collection: From left, Consuelo (Mexico), Dell (USA), Rahel (Ethiopia), Zelia (Brazil), and Lauryce (USA). Photo credit: Hearts 4 Hearts Facebook page

I also quite like Groovy Girls – contrary to their name, there are boy dolls, and they come in many different skin tones and hair colours and textures (yarn). They have been around since 1998, so they would probably be available in second-hand shops as well for more variety. We have a great collection that was given to Molly by my cousin.

Molly's collection of "Groovy Girls" dolls©PicklesINK 2012

Molly’s collection of “Groovy Girls” dolls
©PicklesINK 2012

Online, by asking my good friend Google to find me “ethnic dolls” I also found the following intriguing websites (below). Sadly, the first entry that turned up in my search was toysrus.com, offering “ethnic dolls, including Dora the Explorer, Barbie, and SpongeBob.”

SpongeBob??

Screenshot of Google search for "ethnic dolls"

Screenshot of Google search for “ethnic dolls”

Anyway, moving on…

My World Ethnic Doll Clothing, based in Toronto, Ontario, was founded by a Canadian teacher who wanted to provide parents with the opportunity to purchase doll clothes that represented their cultures. This website provides a wide variety of multicultural fashions, male and female, and androgynous dolls in 4 different skin tones. Prices are shockingly reasonable.

Picture

My World Ethnic Doll Clothing
doll and clothing collection

Kids Like Me, based in the UK, provides educational toys, books, and resources that embrace diversity, special needs and inclusion. Their online catalogue offers a variety of reasonably-priced multicultural rag dolls (boys and girls).

And finally, oddly enough, IKEA has the coolest collection of multi-ethnic, unisex, and extremely reasonably priced doll stuff anywhere…which I suppose should not be particularly surprising since they have for some time been ahead of the game when it comes to providing unisex (ie. neither pink nor blue) toys such as kitchens and toolbenches. The LEKKAMRAT series includes 3 soft doll options (different skin and hair colours and facial features), 4 different sets of outfits, and a bathtime set in which the bathtub is blue. BLUE! IKEA also offers a wooden doll bed with blue sheet and rainbow-striped cover – and listed as “related products” to the doll bed are the children’s “10-piece coffee/tea set,” “5-piece kitchen utensil set,” and “toolbelt with soft toys.”

Photo of LEKKAMRAT dolls in various outfits
from website of Kimberley Bezaire, PhD

Whether you are searching for a doll that looks like your own child, trying to find resources for your classroom or daycare, or looking for ways to promote diversity in your own home, there are definitely options available – in fact, more than I even realized when I started this post.

~ karyn

Guest Post – Ice Cream Pizza

I have invited a guest blogger to write this post, since he is the one who introduced us to the idea of Ice Cream Pizza. I’ll let him introduce himself:

I am Benjamin Pickles and I’m 5 1/2 years old and Ben is the short form for my name.

I got the idea for ice cream pizza from Team Umizoomi.

This is a picture of Mili, Bot and Geo from Team Umizoomi.

On one episode they had to pump up an ice cream truck because the ice cream truck had a flat tire and they also had to make another ice cream pizza because there were 4 kids that were waiting for ice cream pizzas and there were only 3 ice cream pizzas. That’s how I found out how to make an ice cream pizza.

Recipe For Ice Cream Pizza

First step: A cookie

This is a picture of the cookie

This is a picture of the cookie. ©PicklesINK 2012

Second step: You need to put ice cream on the cookie.

This is two cookies with the ice cream on the cookies.

This is two cookies with the ice cream on the cookies. ©PicklesINK 2012

Third step: Put gummy candies on top of the ice cream on the cookie and you can put chocolate on it too.

This one is a picture of one ice cream pizza with the chocolate on it.

This one is a picture of one ice cream pizza with the chocolate on it. ©PicklesINK 2012

This one is a picture of the ice cream pizza with the gummy candies and the chocolate on it.

This one is a picture of the ice cream pizza with the gummy candies and the chocolate on it. ©PicklesINK 2012

And after that it’s all done! After you’ve made it, you can eat it!

This is a picture of Molly eating an ice cream pizza.

This is a picture of Molly eating an ice cream pizza. ©PicklesINK 2012

This is a picture of me eating an ice cream pizza. ©PicklesINK 2012

This is a picture of me eating an ice cream pizza. ©PicklesINK 2012

If you try out the recipe you might like it or if you have kids they might like it too. Ice cream pizza is one of my favourite things to eat for dessert and I hope that you will like it too!

~ Ben

What do you think? Are you going to try it? Did you like it?

The Sneaky Chef

One of the most successful strategies for dealing with picky eaters is the one around which Missy Chase Lapine, also known as “The Sneaky Chef” has built an empire – hiding “healthy” foods in foods with more picky kid appeal. Her first book includes recipes for a number of make-ahead purees in colours that will hide easily in various foods. For example, her Purple Puree becomes an invisible part of her Brainy Brownies. It’s a brilliant idea, and I sure wish I’d thought of and cashed in on it first!!

The basic idea is just that – basic – though, so you don’t really need to buy her books in order to mix less “desirable” ingredients into recipes that will spark a more positive reaction (or at least less screeching) than those ingredients on their own. (One I’m really intrigued to try is a recipe I have for brownies with pureed black beans. Don’t tell Ian.)

This week’s success story was a ham and cheese pasta bake, one of Ian’s family’s favourites growing up. It’s a delicious casserole dish full of cheesy yumminess, but incorporates no fruits or veggies, so usually they would have to be served on the side.

For some reason, even though it is made entirely of stuff Ben LIKES (individually) pasta bake is guaranteed to provoke a dinnertime meltdown before he eats that crucial first bite…and a Ben dinnertime meltdown is guaranteed to provoke similar complaints from Molly even though she doesn’t actually mean them (“Yeah! I don’t like this too! *nom nom nom* It’s yucky! *nom nom nom*).

Ham and Cheese Pasta Bake

1lb cooked short pasta (ie. fusili, penne, rigatoni)
4 eggs
1/2L half&half or table cream
200g shaved ham, chopped
2 cups (at least) cheese (ie. cheddar, Swiss, mozzarella, gruyere – don’t use all orange cheddar or you’ll get that icky orange grease, and don’t use all mozzarella or it won’t have enough cheesy flavour)

Preheat oven to 375°F. Mix eggs and cream together. Mix in cheese (reserving ½ cup for top) and ham. Pour over pasta in a large casserole dish (or 2 smaller ones) and mix well. Top with remaining cheese. Bake in oven for 45-60 minutes or more if necessary to set filling. (The deeper the dish, the longer it will take.) Broil for a minute or so to brown top if desired. Top with fresh ground pepper for serving.

Delicious! Delicious hot from the oven, delicious reheated for lunch, delicious with a side salad…

Anyway, the other day I was inspired to try to make it a bit healthier, Sneaky Chef-style, as well as remove the need for the vegetable side, so I suggested that Ian (who was in charge of the cooking that day) replace part of the eggs and cream with a can of pure pumpkin puree. The result was:

Pumpkin Puree Pasta
©PicklesINK 2012

The kids literally ate it up (and in this case, use of the word ‘literally’ will not make me figuratively insane!). I think I may have to bring it to market: Picky Pickles-Pleasing Pumpkin Puree Pasta – It’s so delicious I guarantee that the only thing melting down will be the cheese!

One thing that I do find important about the “sneaky” method is not actually being sneaky. Once the kids have tried and like it, I do the big reveal: “Do you know what the secret ingredient is that makes it so yummy? PUMPKIN!!”

Molly tasting the pumpkin pasta.
©PicklesINK 2012

I was hoping that the pumpkin would be neutral and not overpower the cheese, but it came out a touch sweetly pumpkinny for the grown-up palate. I think it might have been better with a stronger-flavoured cheese, like a Gruyere or goat cheese. As well the ham got a bit lost, so I would be tempted to replace it with either a mild Italian sausage to complement the pumpkin or a salami or Chorizo sausage to spice it up a bit.

What do you think? Appealing or yucky? How do you deal with dinnertime meldowns?

Holy vats of chili, Batman!

A committee that I am on at my church (okay, full disclosure: The committee to prepare for a congregational vote regarding the marriage policy, as described in a previous post) is hosting a lunch and discussion session this coming Sunday. Racked with guilt because I cannot be there for the actual discussion, I volunteered to make chili for the lunch. We have no idea how many people will actually attend, but we optimistically decided to be prepared for 40-50, so this afternoon I found myself making giant vats of chili, which actually went much more smoothly than I ever could have imagined, even with Ben’s “help”!

I had an idea for my chili, based on my dad’s recipe on which I grew up, but in order to get an idea for how many people it would feed, I asked my friend Google to find me a “fast chili recipe with beef” and then chose the one closest to my dad’s, which gave me this:

CHILI — THE FAST AND EASY WAY
2 lbs. ground beef
1 lg. onion, chopped
2 (16 oz.) cans red kidney beans
2 (16 oz.) cans stewed tomatoes (preferably Mexican style)
2 (16 oz.) cans tomato sauce
2 tbsp. chili powder

Brown ground beef and onions together in skillet. Transfer to large kettle. Add the remaining ingredients and cook over medium low heat. Cook until heated well and most of the liquid is cooked down. This can be adjusted easily according to your own taste for thicker or thinner chili.

I quadrupled the amounts and planned some modifications, adding tomato paste, corn, garlic, and red and green bell peppers and substituting ground pork for some of the beef, and reducing the amount of meat while increasing the amount of beans slightly. I also used a variety of beans instead of just red kidney beans. That left my shopping list looking like this:

5 lbs. ground beef
2 lbs. ground pork
6 bell peppers (red and green)
4 large onions
20 cloves garlic
10 cans beans (red kidney beans, white kidney beans, black beans)
4 cans whole stewed tomatoes
4 cans diced tomatoes
8 cans tomato sauce
3 cans tomato paste
1 bag frozen corn
1 packet chili powder

I got it home and started chopping, making good use of my trusty Cusinart Mini-Prep food processor (fantastic for making family meals into baby food as well as for finely chopping onions and garlic!).

Ingredients assembled: Finely chopped onion and garlic, diced peppers, and a vast array of canned tomatoes and beans.
©PicklesINK 2012

Once the chopping was done, I started cooking the ground beef and pork

Ground beef and pork cooking on the stove.
©PicklesINK 2012

and put Ian and Ben to work opening cans.

Ben pouring tomato sauce into the giant vat o’ tomato.
©PicklesINK 2012

Ben next job was to find and crush the whole tomatoes, which he did with relish.*

Tremble with fear, tomatoes,
at the wrath of Sir Ben!
©PicklesINK 2012

Once all the meat was cooked, I cooked the onions, garlic, and peppers in batches, mixed them with the meat, and assembled my vats o’ ingredients.

Vats o’ ingredients: Tomato mixture, meat/onions/garlic/peppers, and mixed beans.
©PicklesINK 2012

Finally, I mixed it all together in my three biggest pots, trying to keep the ratio of ingredients as even as possible, and added liberal amounts of chili powder to each.

My 3 biggest pots barely fit on the stove together!
©PicklesINK 2012

It looked pretty good mixed together, and smells pretty fabulous simmering on the stove. I plan to add the frozen corn when it’s finished to help cool it down.

Yummy-looking pot o’ chili!
©PicklesINK 2012

Stay tuned until next week when I will hopefully hear how the congregation liked it – Same BAT-TIME, same BAT-CHANNEL!

~ karyn

*Please note that the relish was figurative. Real relish would have been gross.

Food glorious food…coma.

German food. Very, very yummy. Not a lot of emphasis on green. Or red. Or orange. Unless they’re Smarties and gummy bears sprinkled on ice cream. But definite emphasis on the delicious. Here is the round-up of what we ate:

Every morning started with someone, usually Grandad, venturing to the bakery (or “makery,” as Molly termed it, which makes a sort of sense) with one or two children in tow to pick up fresh rolls (and gummy bears for the kids – breakfast of champions!).

Fresh-baked every morning!
©PicklesINK 2012

These would be served at the breakfast table along with soft-boiled eggs, fresh-churned butter, assorted jams, ham and salami, and local cheeses, most notably the delicious Heumilchkäse and Blumenkäse (literally, hay-milk cheese and flower cheese). The Heumilchkäse has a distinctly barnyard aroma and strong flavour and the Blumenkäse is milder and rolled in dried wildflowers. Heaven for a cheese-lover like myself! Ian wasn’t quite so enthralled and the kids were for the most part indifferent.

Heumilchkäse and Blumenkäse
©PicklesINK 2012

I have to confess to a weakness for Schnitzel und Spätzle so I sampled both as often as I could. My first opportunity was outside of Munich when we went to get the estimate for my (*sniff*) broken stroller (*sniff*) where we stopped at a hole-in-the-wall restaurant and I had Schnitzel mit Pfeffer-Sahnesauce und Spätzle (schnitzel with peppercorn cream sauce and spatzle noodles/dumplings). I was so hungry that I ate it all without thinking to take a picture first so unfortunately I have no record except for the memory of its utter deliciousness, but the sauce was creamy and amazing and the spatzle was plump and had been crisped to golden perfection.

We enjoyed a lovely meal al fresco at the Biergarten across from the house where I had Champignon Schnitzel und Spätzle (schnitzel with mushroom cream sauce and spatzle). I realize that I have unfairly painted all of the German chefs with the same brush – as you can see this meal did include some green and orange!

Champignon Schnitzel und Spätzle.
©PicklesINK 2012

Ben and Molly each enjoyed a Kinder-Schnitzel und Kartoffel Kroketten (kiddie meal of schnitzel with potato croquettes), to which I had introduced my picky eater before we left to make sure that there was something he would eat in German restaurants…

Kinder-Schnitzel und Kartoffel Kroketten
©PicklesINK 2012

And German mall food courts:

Schnitzel und Spätzle (again)
©PicklesINK 2012

On another beautiful sunny day out we again had lunch on the patio of another local restaurant where I had (you guessed it!) Jägerschnitzel und Spätzle (schnitzel with mushroom gravy) and a Radler (half Pilsner, half Sprite). Yes, I may have a Spätzle problem.

Jägerschnitzel und Spätzle
©PicklesINK 2012

Ian went off script and had Hähnchen-Cordon-Bleu mit pommes (chicken cordon-bleu with french fries). Once again, I realize that I was unfair to the German chefs as his meal also included a variety of vegetables. Bundled together with a strip of bacon.

Hähnchen-Cordon-Bleu und pommes
©PicklesINK 2012

Sometimes of course we needed a break from the heavy German food. Fortunately there was an excellent take-away pizza restaurant down the road that did European-style thin crust wood-fired pizza with every topping imaginable. 

Pizza Hawaii
©PicklesINK 2012

Pizza Oliven Salami Peperoni
©PicklesINK 2012

For our last night out we ate at an Italian restaurant where I had Tortellini mit Gorgonzola, which was delicious,

Tortellini mit Gorgonzola
©PicklesINK 2012

and a bowl of Pfifferlingen Cremesuppe, a cream soup of the locally in season Chanterelle mushrooms.

Pfifferlingen Cremesuppe
©PicklesINK 2012

Of course, it wasn’t all savoury dishes. Germans are also very fond of ice cream. In the form of ice cream sundaes:

Haselnuss-Eis
©PicklesINK 2012

Banana splits:

Bananen-Eis
©PicklesINK 2012

Liquor-spiked chocolate milk with a scoop of ice cream topped with whipped cream and chocolate shavings:

Baileys Eisschokolade
©PicklesINK 2012

And of course, appropriately small portions of ice cream for the children:

Kinder-Überraschung-Eis
©PicklesINK 2012

As comfortingly delicious as it all was, the first thing we did when we got home was head to the grocery store to stock up on a fresh, crisp, brightly-coloured assortment of fruits and vegetables.

Produce, sweet produce!
©PicklesINK 2012

I ate half a cantaloupe for dinner yesterday and I may swear off white flour for good.

~ karyn