Last week a cold snap hit Southern Ontario with temperatures hovering around -20°C (closer to -25°C with the wind chill) all week, which meant that we stayed in the nice warm indoors as much as possible except for every night when Ian bundled up in many layers and went outside to flood the skating rink!
We built our first backyard skating rink last winter. The year before that we had signed both Ben and Ian up for beginner skating lessons with the local figure skating club and it was a dismal failure. For half of Ian’s classes, the instructor didn’t even show up, and Ben’s class required parents to stay on the ice so the teenaged instructors could say, “Um, okay? So now we’re going to practice walking like a duck? Okay so now moms and dads help them practice that for a bit?” and then chat while you did so. I have to admit I got a little short with them – “So, uh, when do you start actually teaching him to skate? Do I just keep telling him to walk like a duck until he figures it out, because, y’know, I could be doing that at home for free…”
The next year we put Ben in the hockey-based beginner skating program (basically the same thing, but in hockey equipment) and that went much better.
Since Ben’s skating was going well, and to get the rest of us some exercise and practice we decided to build the backyard rink. I asked my dear friend Google how he thought we should go about it and after reading through many helpful suggestions (Did you know that you can buy what is basically a giant Ziploc bag that you fill with water, allow to freeze, and then peel back?) we decided on the “build rectangular frame out of boards, nuts and bolts, and L-brackets, overhang with a large tarp, and flood repeatedly” method.
“How To” Details:
We used 6 12′ lengths of 2″ x 10″ boards, 4 L-shaped metal brackets, and a bunch of nuts & bolts (probably about 5″ long). We squared the corners of the boards side to end (as opposed to mitering them) and bolted the L-brackets to them. For the long sides we overlapped 2 boards in the middle to make approximately a 22′ length.
Once you’ve built your frame, spread a tarp over top of it all (it needs to be about 2′ longer and wider than the frame; I thinks ours is 15′ x 25′ while the frame itself is about 12′ x 22′) and secure to the frame or the ground outside so it doesn’t get blown back over.
When the forecast calls for about a week of below freezing temperatures, flood with a garden hose (attached to an INDOOR tap so you don’t freeze your pipes!) for 1-2 hours each night until you have an even thickness of ice.
At the end of the season, you can just dismantle the frame, fold up the tarp, and store the materials for next winter.
Sadly, the first winter we decided to go all Walter Gretzky also happened to be the worst winter for outdoor skating in Ontario in about 50 years. We skated on our rink exactly 3 times, and 2 out of those 3 times we had to stop when the water on which the slab of ice was floating welled up over the edges and flooded the surface. But it was worth it, damn it!!
Fast-forward back to 2013: By Friday night the rink was absolutely beautiful – 10 inches of solid ice ready and waiting to be scarred by the blades of 4 pairs of hockey skates. The only problem was that it was still way too freaking cold to go outside! By Sunday it had warmed up a bit and after working through a few hitches (Ben had outgrown his skates and he and Ian drove all over the city looking for a store that was both open and carried ice skates. He got the kind that adjusts to 4 different sizes in the hope of not going through this again next year.) we were ready to go!

Molly, Ben, and mommy on the ice.
©PicklesINK 2013
There was a minor (okay, MAJOR) meltdown when Ben decided that he was going to teach Molly to skate even though he was having trouble remembering how to stay upright on his own skates.

Ben chasing Molly around the rink in an attempt to “teach” her to skate
©PicklesINK 2013
In the hope of distracting him and buying Molly some time to practice without being mauled by her brother, I suggested that he could be Molly’s teacher as soon as he demonstrated that he could skate 5 times around the rink without falling down. Big mommy mistake – a huge, heartbreaking meltdown ensued: “I’M TRYING *hiccup* SO HARD *sob* AND I CAN’T DO IT *sob sob* I KEEP FALLING DOWN *hiccup* AND I REALLY REALLY WANT *gasp sob* TO BE MOLLY’S TEACHER *hiccup gasp*!!”

Giant Ben and mommy hug on skates
©PicklesINK 2013
After much crying, hugging, comforting, reassuring, talking, *confession cam again* one teeny instance of yelling (“Okay, STOP CRYING. NOW. STOP IT!” “Team Pickles *sniff* No Yelling.”), and more hugging and comforting, we got back to the business at hand (well, foot).

Ben skating confidently around the rink.
©PicklesINK 2013

Molly skating confidently around the rink with her adjustable ‘pusher’ – an awesome curb-side find near my parents’ house!
©PicklesINK 2013
Finally, as it started to get dark and everyone was getting a little tired we decided it was time to head inside for dinner.

Molly sitting down for a little break.
©PicklesINK 2013

Ben and mommy heading off the ice.
©PicklesINK 2013
If we had realized what the weather had in store for the following week, we might not have been so quick to wrap up!

Weather forecast for Hamilton, ON, January 29-30, 2013
Screenshot from www.theweathernetwork.com
Amidst pouring rain and Spring-like temperatures, our beautiful rink quickly turned into a slushy wading pool.
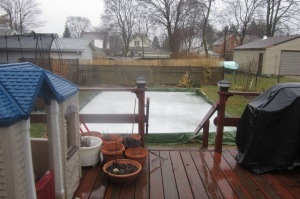
The soggy, slushy former ice rink.
©PicklesINK 2013
But looking out my window now at the blowing snow and with temperatures forecast to be back below freezing for the next couple of weeks, we can hopefully get back to the business of training up The [next] Great One (full disclosure: It will probably be Molly).
~ karyn
Have you ever built a backyard rink? Do you have any tips?
Karyn, we’ve been there! We tried backyard rinks for a few years before “we” gave up – well, I had not been hung ho after year one of hose running through the living room, but DH took a little longer. Lot of work and some fun, you’ve got to try it at least once!
I remember looking through all the Google results and thinking “Just stomp down the snow in the middle and build up the sides at least 4 inches…snow? what snow?” I don’t know if I can bring myself to keep it up through too many more mild winters! At least this year we got a nice new hose so we don’t have to wrap a towel around the laundry room faucet to control the spray!
Check out Iron Sleek for everything you need to build a backyard ice rink the easy way.
Pingback: Backyard food gardening: If I can do it, ANYONE can! | PicklesINK